Mobile (Android/IOS) /Third Party Email (Outlook/Thunderbird)
BlueTie Pop/IMAP Server Settings are as follows:
POP: pop.bluetie.com
IMAP: imap.bluetie.com
SMTP: smtp.bluetie.com
Note: We no longer provide support for Outlook 2010 or earlier.
Android Mobile Device Email Setup
Email Setup
Step 1:
From the home screen, open the Settings, and then touch Email.
Step 2:
Enter your Email address and Password then select Next.*
Step 3:
Enter a name for your account, the name to be displayed on outgoing messages then select Done. Your account is setup and your Inbox will be displayed. If prompted for type of account go to Step 4.
Step 4:
Select the type of email account. (POP/IMAP)
Step 5
Enter your Incoming Server Settings:
Note: IMAP is a mirror image of your webmail emails, so if you delete emails via IMAP account, it will delete the emails from your webmail account as well. IMAP is recommended when you have multiple accounts setup. You'll also see all of your webmail folders ( and vice-versa) when using IMAP. Pop brings over a copy of your inbox messages only
POP: pop.bluetie.com
IMAP: imap.bluetie.com
Then select Next.
Step 6
Enter the Outgoing Server Settings: smtp.bluetie.com
You'll also either need to check the box for Outgoing Server Requires Authentication or you'll need to enter your full email address and password again:
Apple/IOS Mobile Device Email Setup
Go to Settings > Mail, then tap Accounts.
Tap Add Account, tap Other, then tap Add Mail Account.
Enter your name, email address, password, and a description for your account.
Tap Next.
Mail will try to find the email settings and finish your account setup.
If Mail finds your email settings, tap Done to complete your account setup.
If Mail can't find your account settings automatically:
If Mail can't find your email settings, then you need to enter them manually. Tap Next, then follow these steps:
Choose IMAP or POP for your new account. If you aren’t sure which one to choose, contact your email provider.
Enter the information for Incoming Mail Server and Outgoing Mail Server. These would be:
Incoming:
IMAP - imap.bluetie.com
POP - pop.bluetie.com
Outgoing Server (Requires Authentication with Bluetie Email/Password):
smtp.bluetie.com
Calendar, Tasks, and Contacts for Android
Topics:
- Get the app
- Initial setup
- Switch between calendar and tasks
- Add/Remove profiles
- Manual syncing
- Syncing contacts
- How To Obtain the BlueTie Calendar for Android
-
Setting Up Your Initial Profile
-
Setting up your initial profile couldn't be easier.
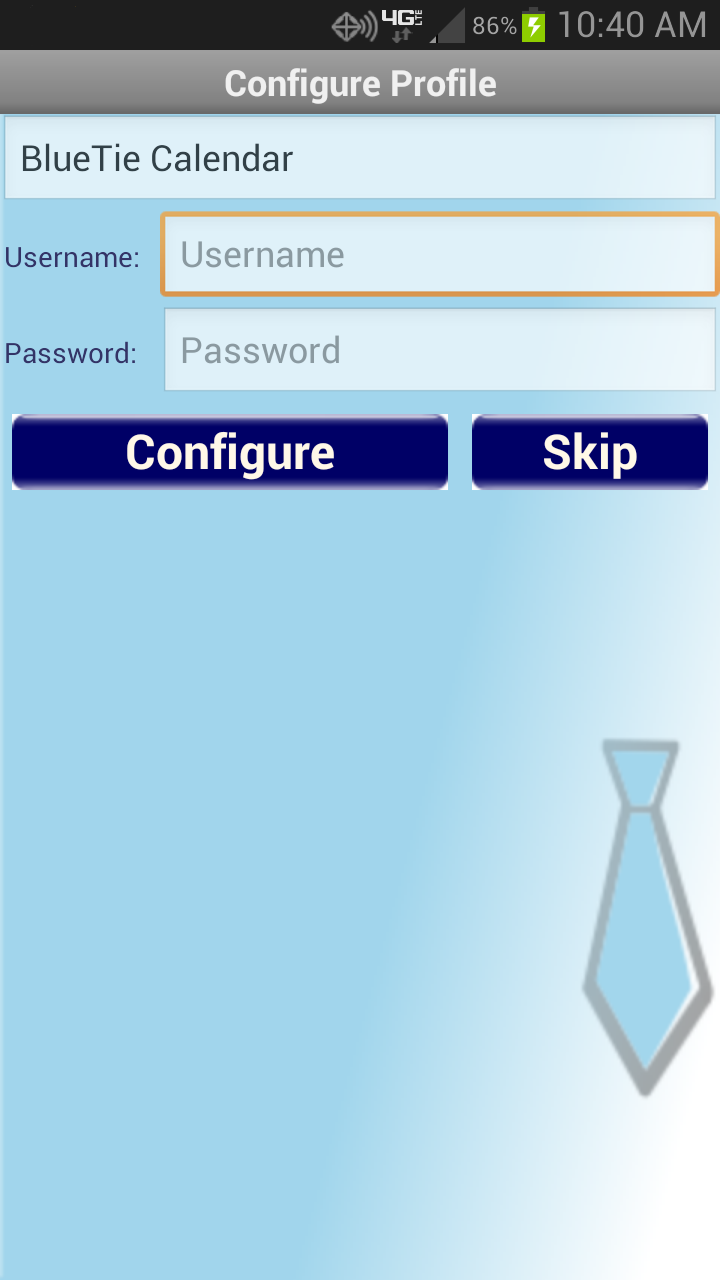
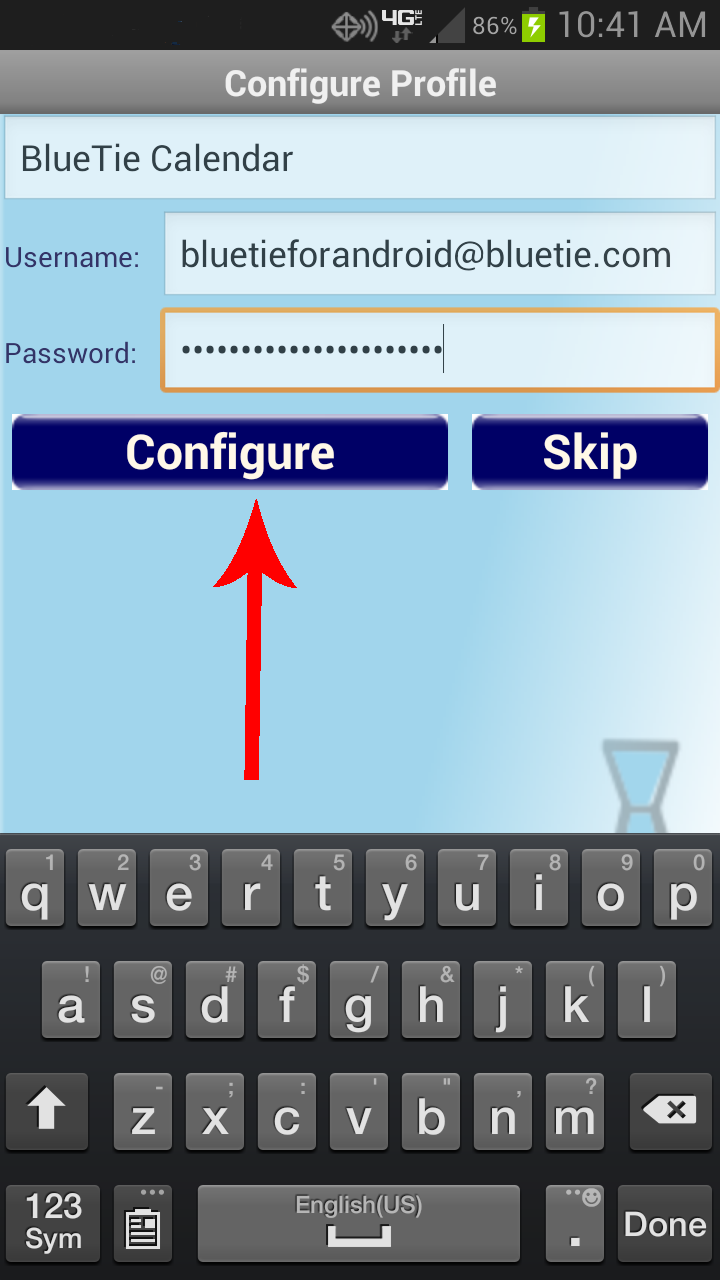
The first time you load the BlueTie Calendar App, The following screen will appear.
Just fill in your Username and Password and click configure.
-
Switching Between Calendar(events) and Tasks
-
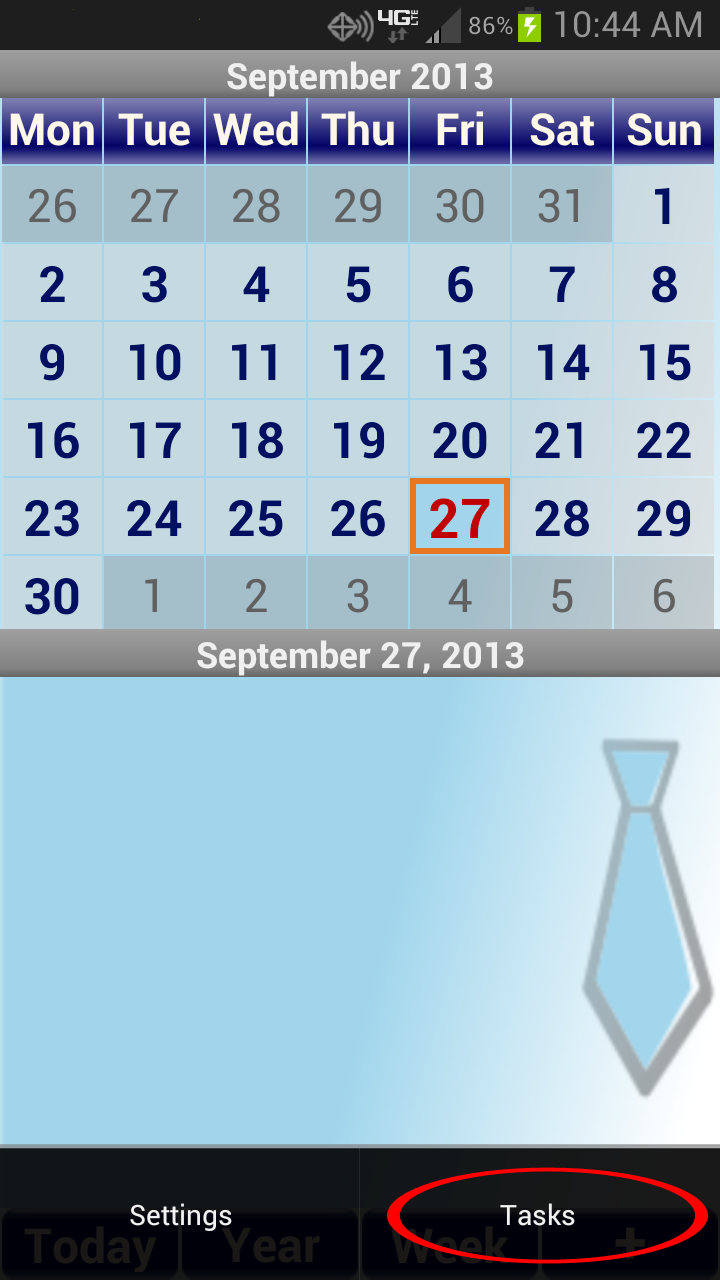
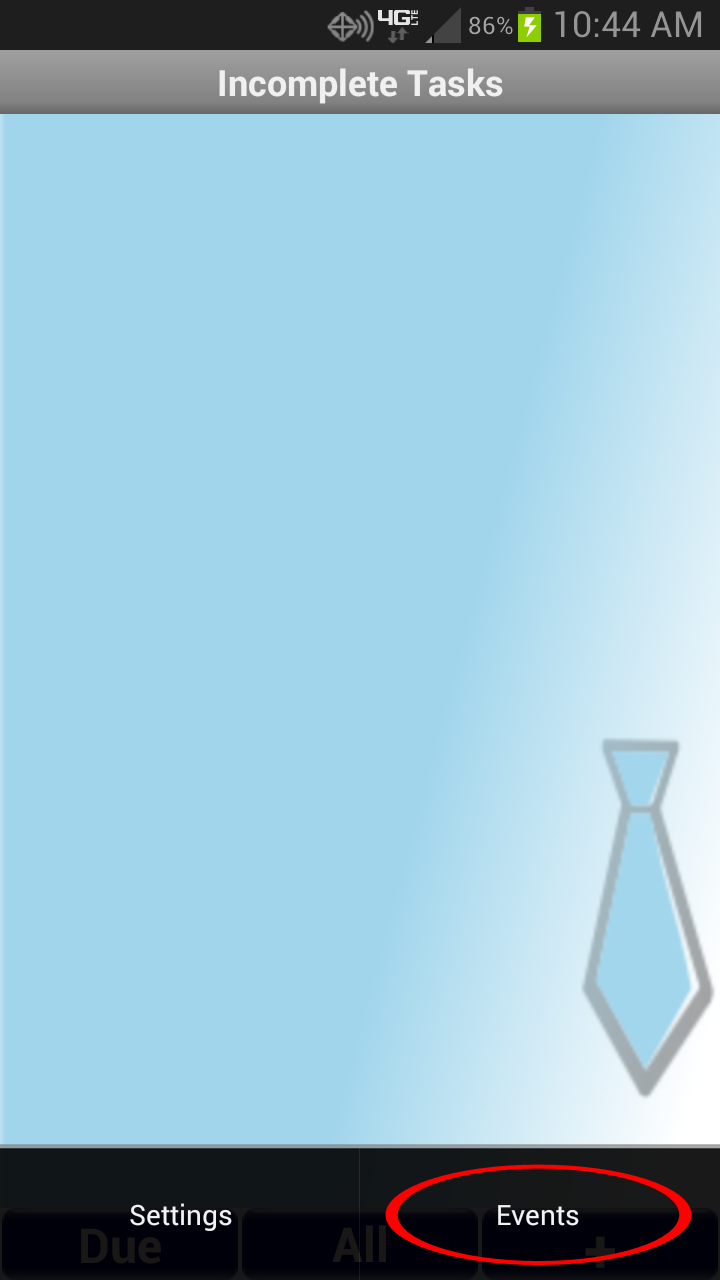
To switch between the Calendar(events) and Tasks push the menu key on your phone.
Then click either Tasks or Events (depending on what mode you are in).
-
Add/Remove a Profile
-
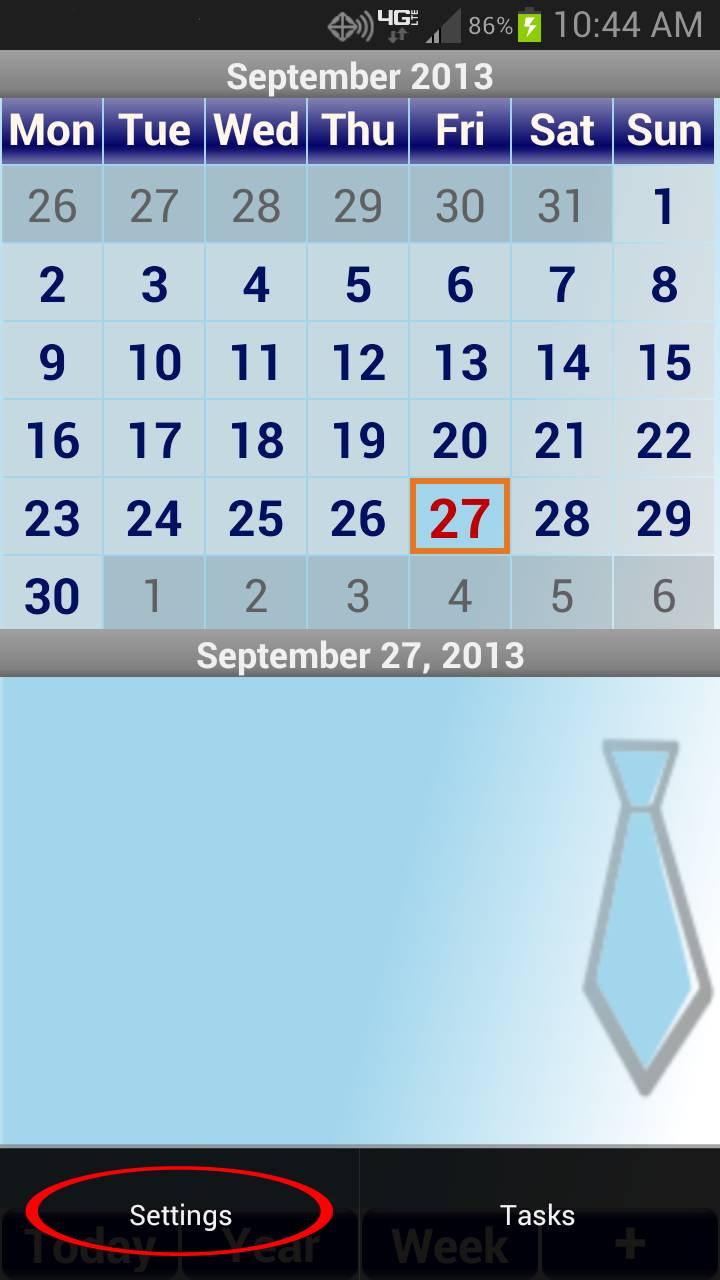
Click the menu button on your phone and click settings.
-
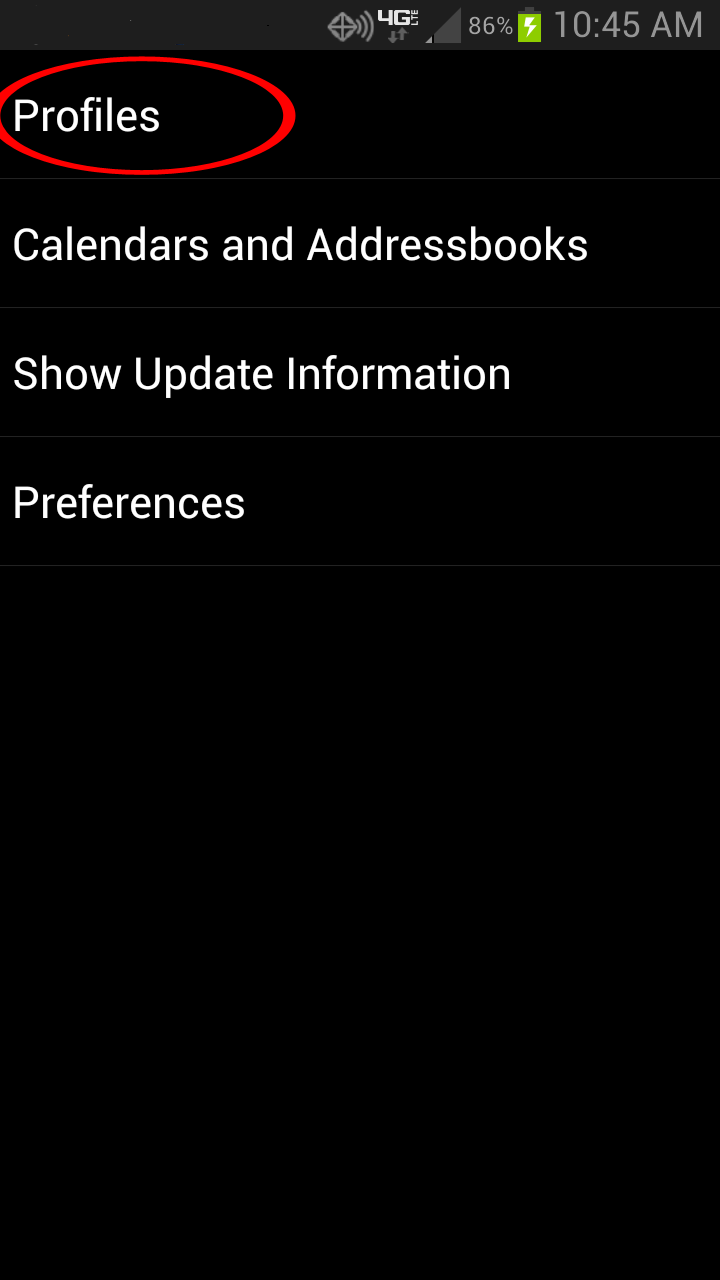
Click the Profiles Button.
-
Adding a Profile
-
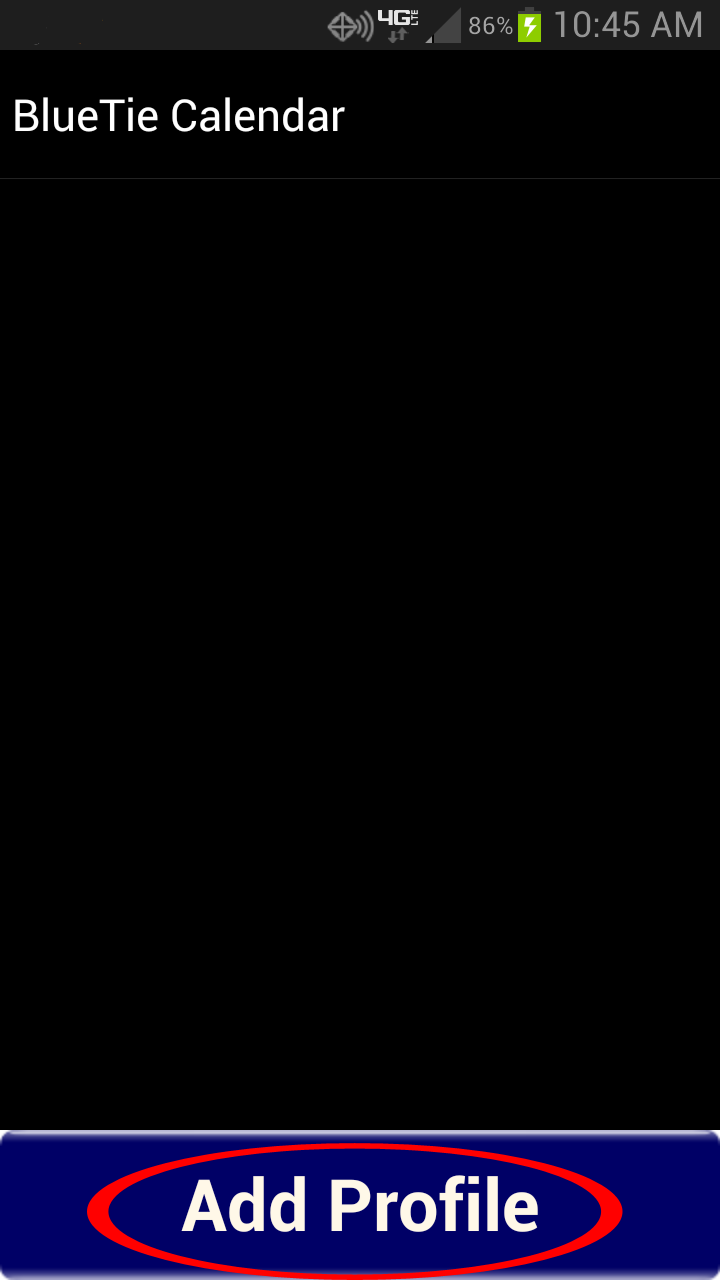
Click the Add Profile Button.
-
Click the BlueTie Logo.

-
Click on Username and enter your username and Click on Password and enter your Password and click Apply
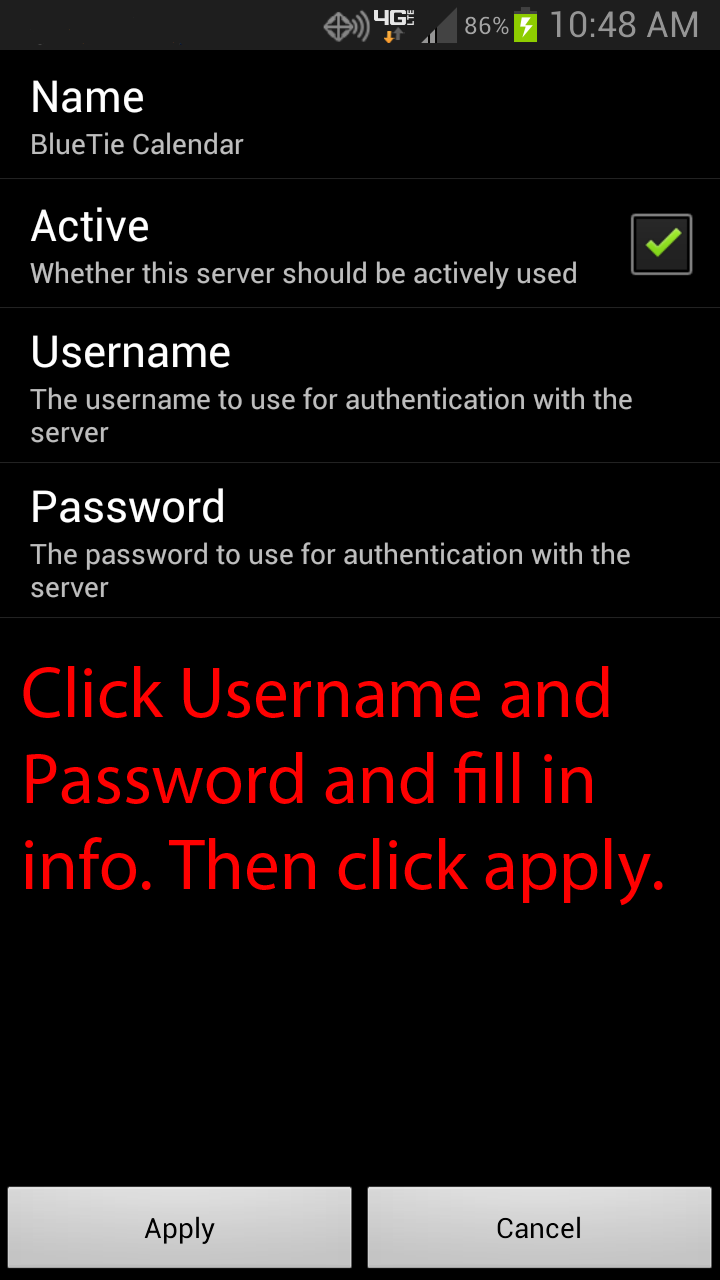
- Click Apply.
-
Click the Add Profile Button.
-
Removing a Profile
-
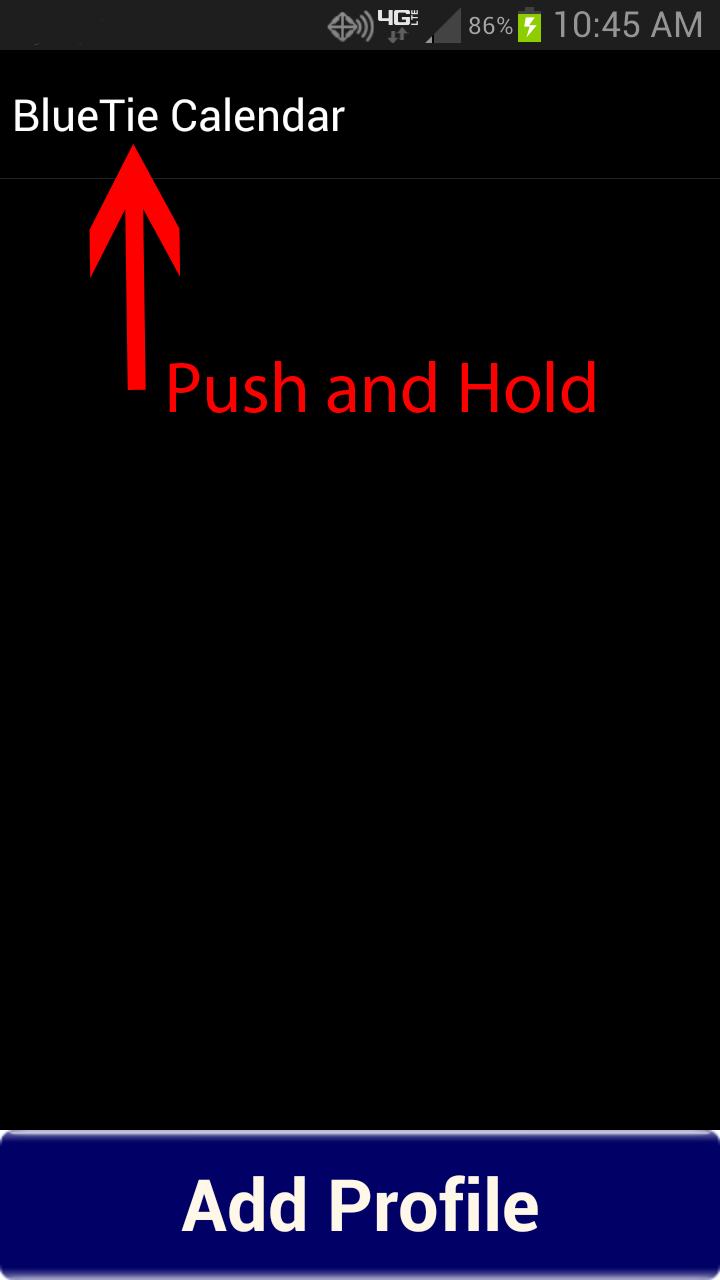
Long Press on the profile you want to delete.
-
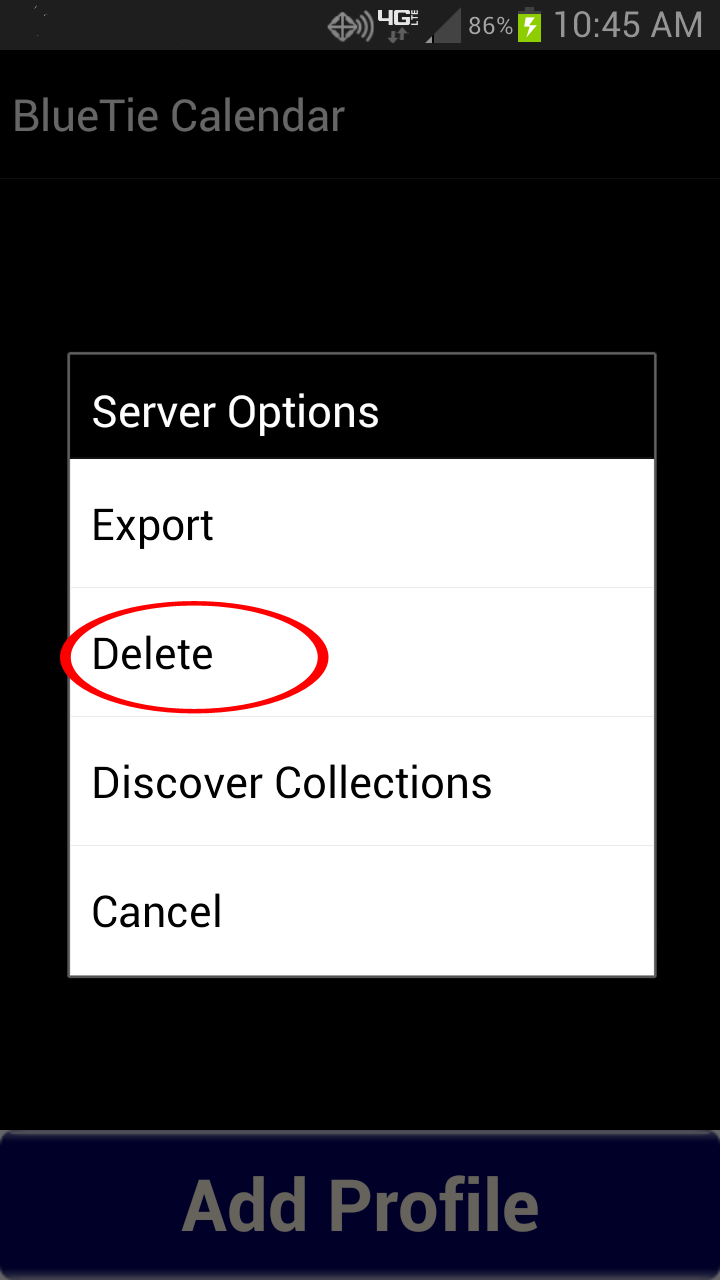
Click delete.
-
Long Press on the profile you want to delete.
-
Click the menu button on your phone and click settings.
-
Manually ReSync Your Calendars & Tasks
-
Do the following steps to manually sync your calendar:
-
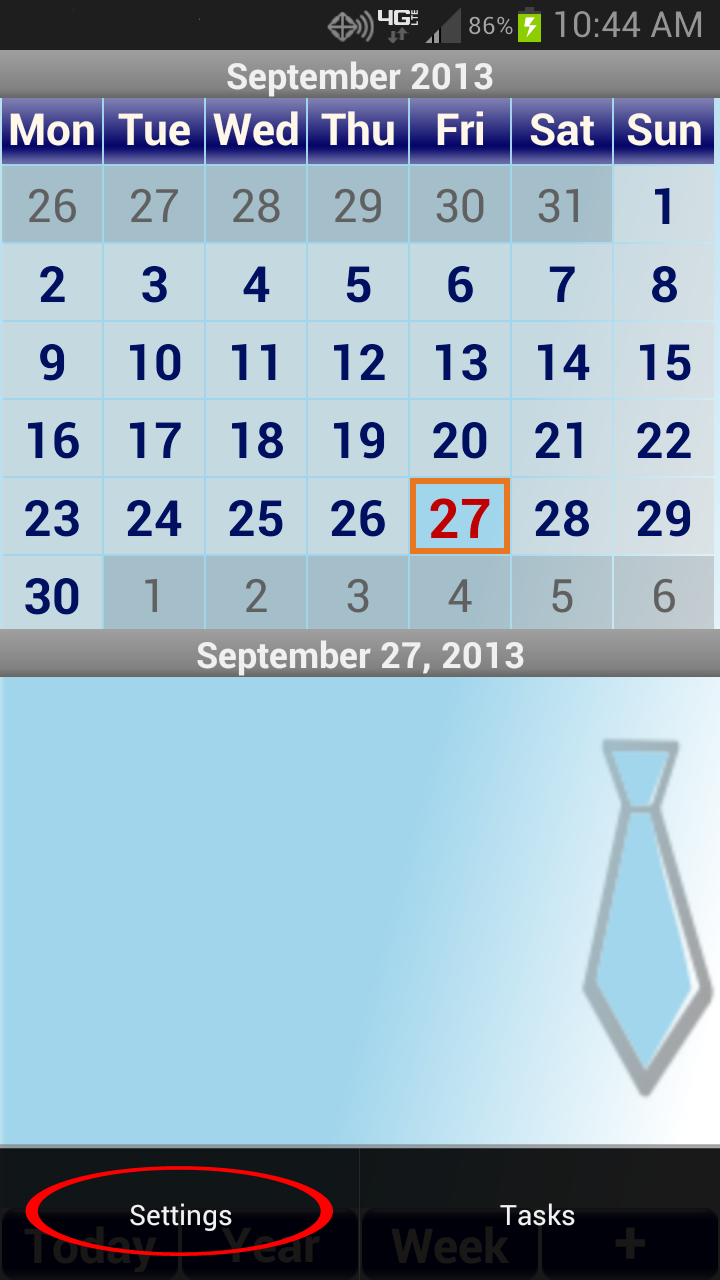
a.) Click the menu key on your phone and press settings.
-
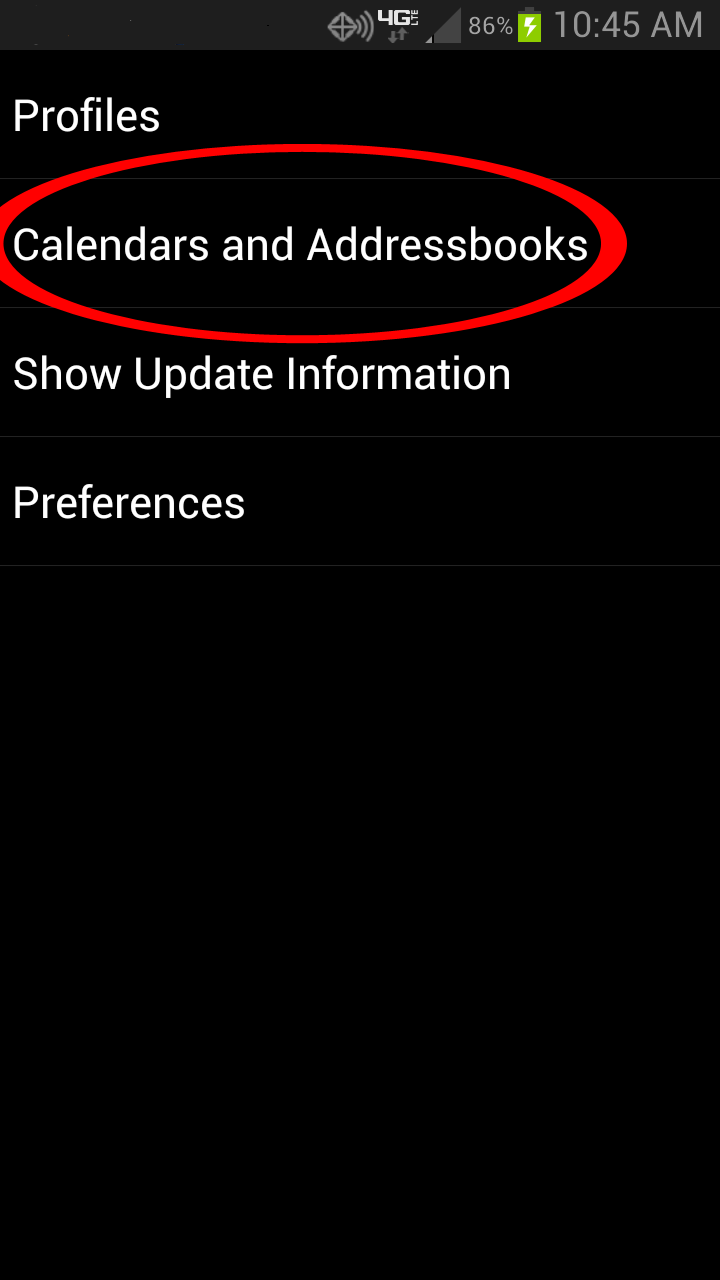
b.) Click on "Calendars and Addressbooks".
-
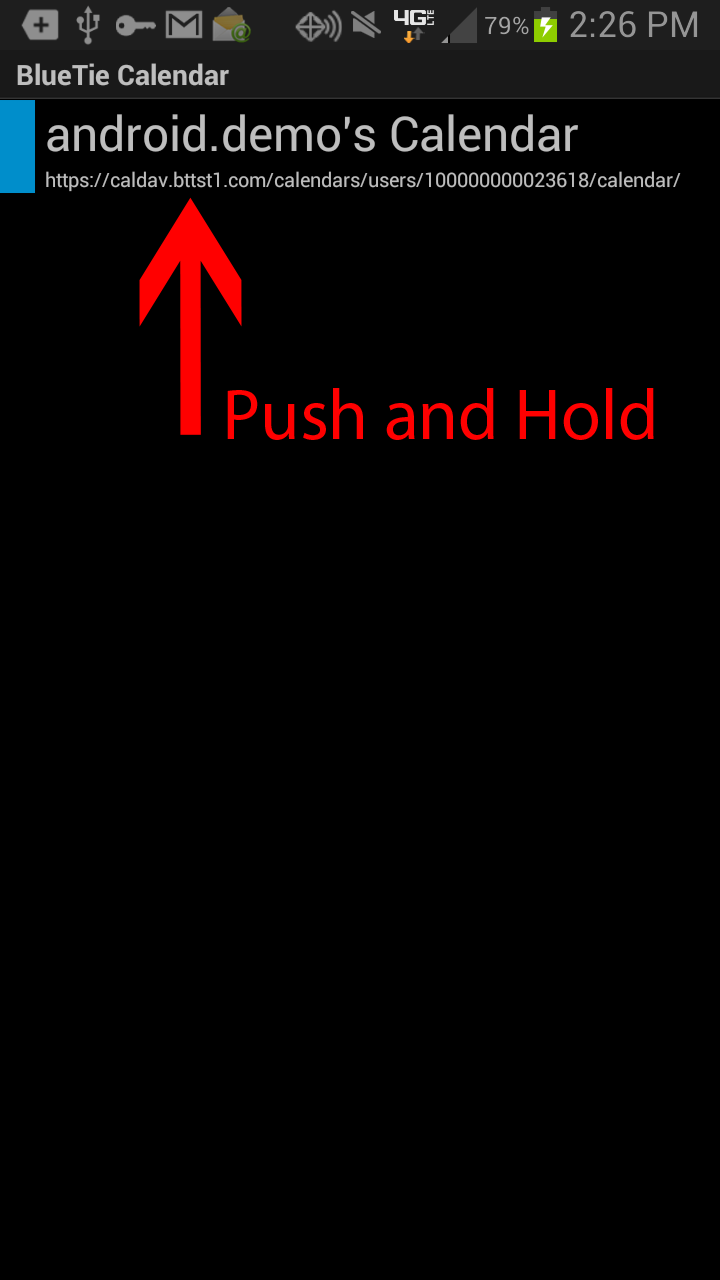
c.) Long press on the calendar that you wish to sync.
-
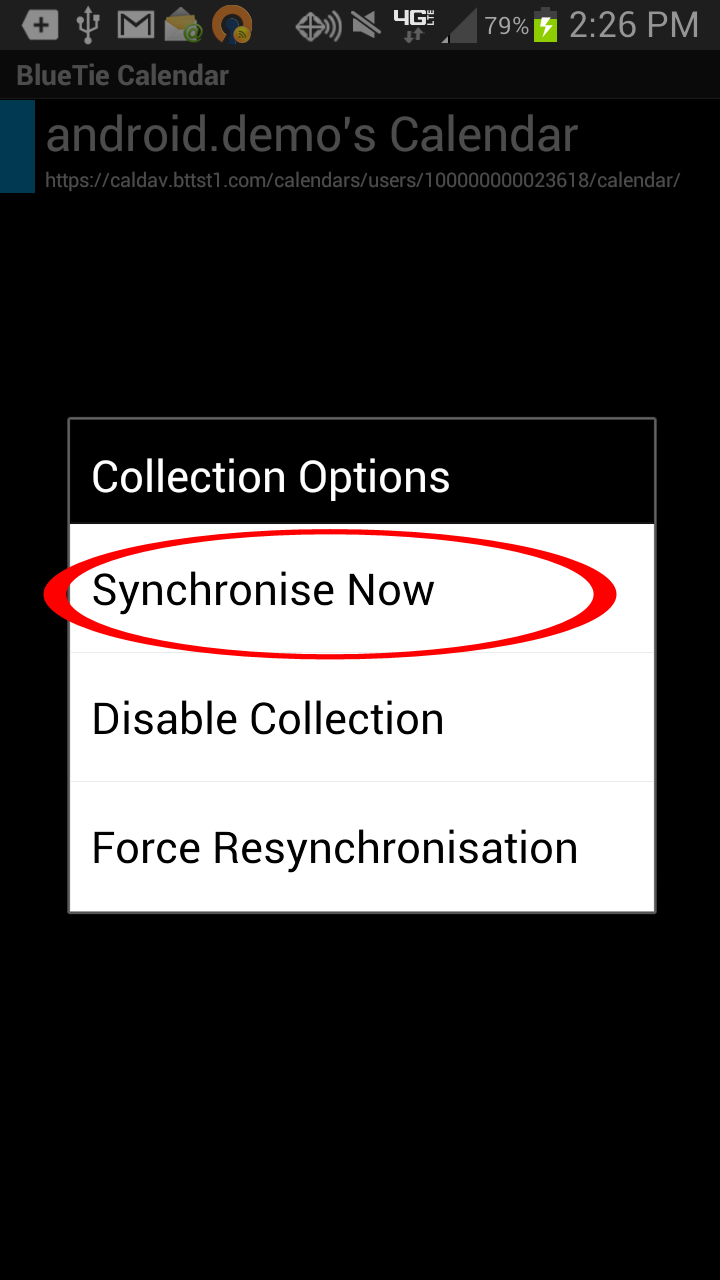
d.) Click "Synchronise Now or Force Resynchronisation".
-
a.) Click the menu key on your phone and press settings.
-
Sync BlueTie contacts to your phone
-
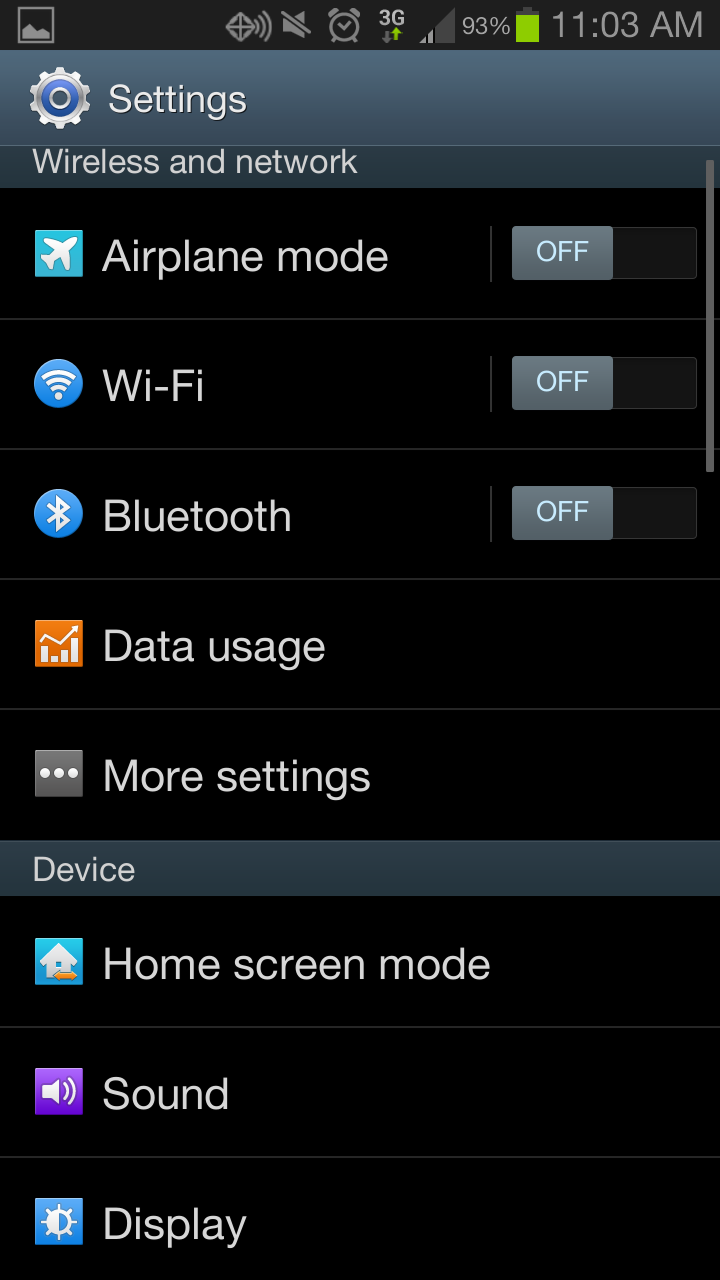
Navigate to the settings menu on your phone.
-
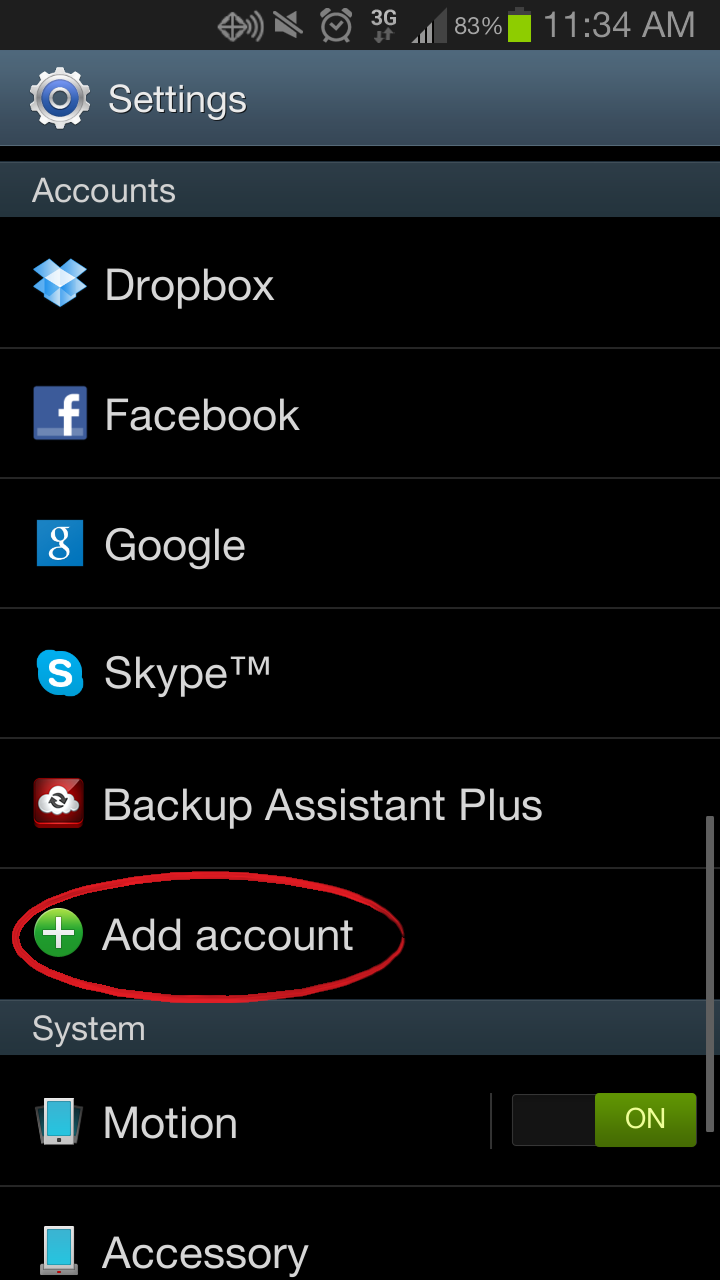
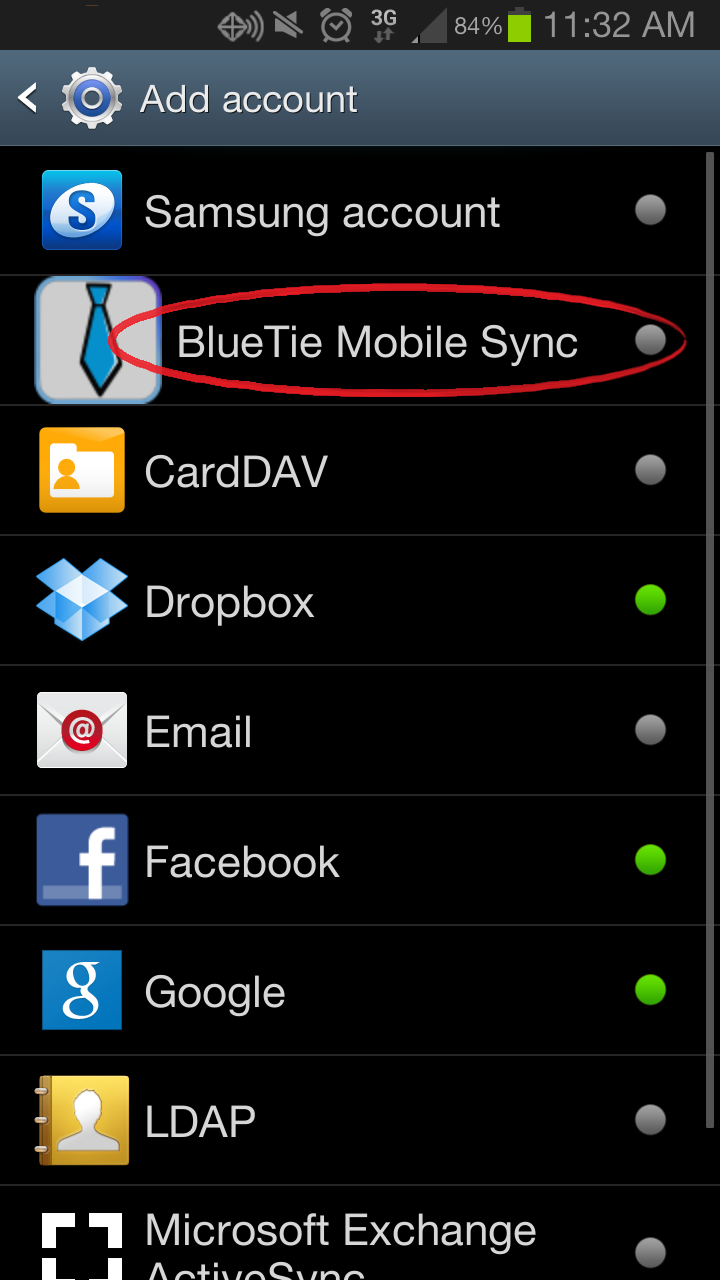
Locate the accounts section and press "Add account"
-
Press "Add account" and select BlueTie Mobile Sync
-
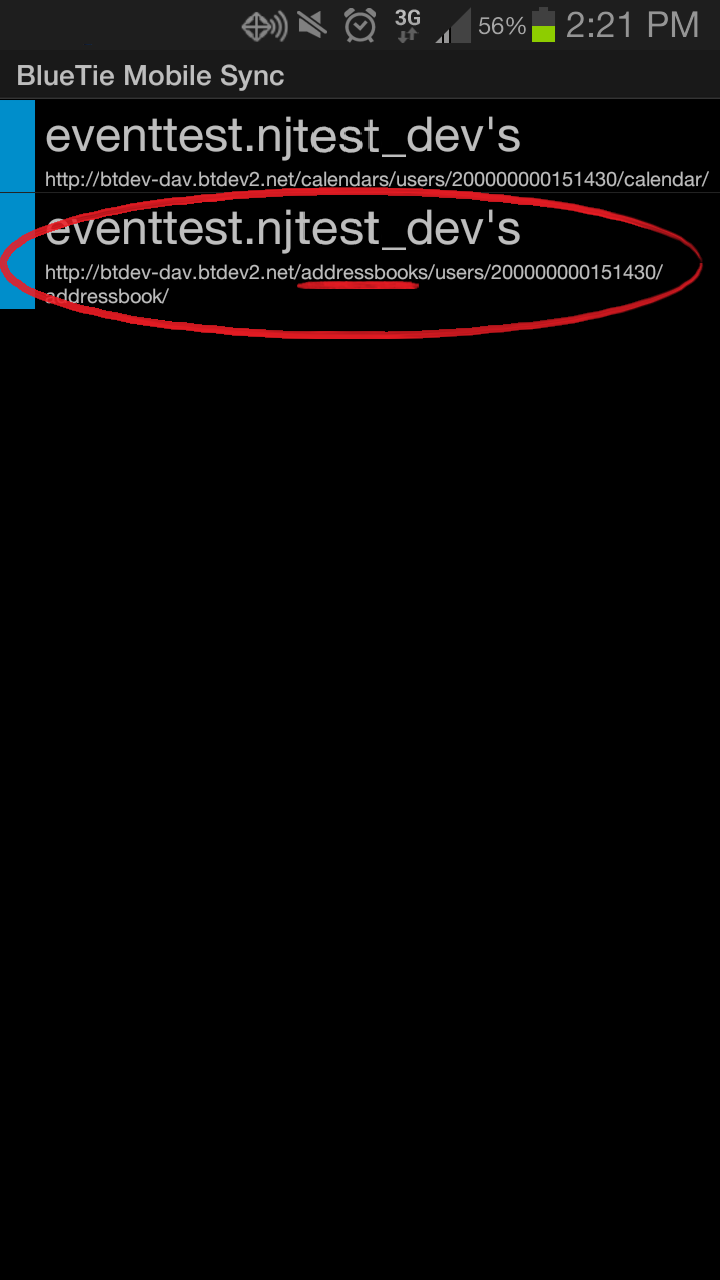
Choose the address-book you want to sync with. Look for the word address-book in the smaller text
-
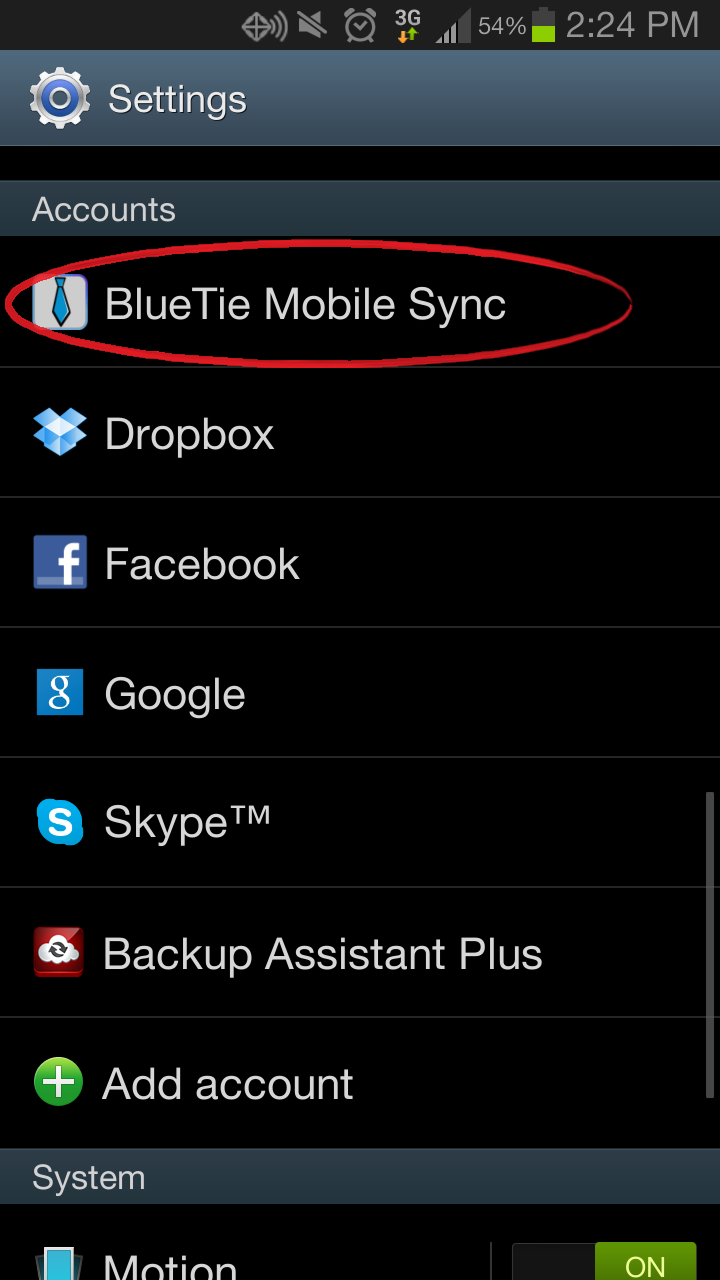
Tap the BlueTie Mobile Sync account in the settings menu
-
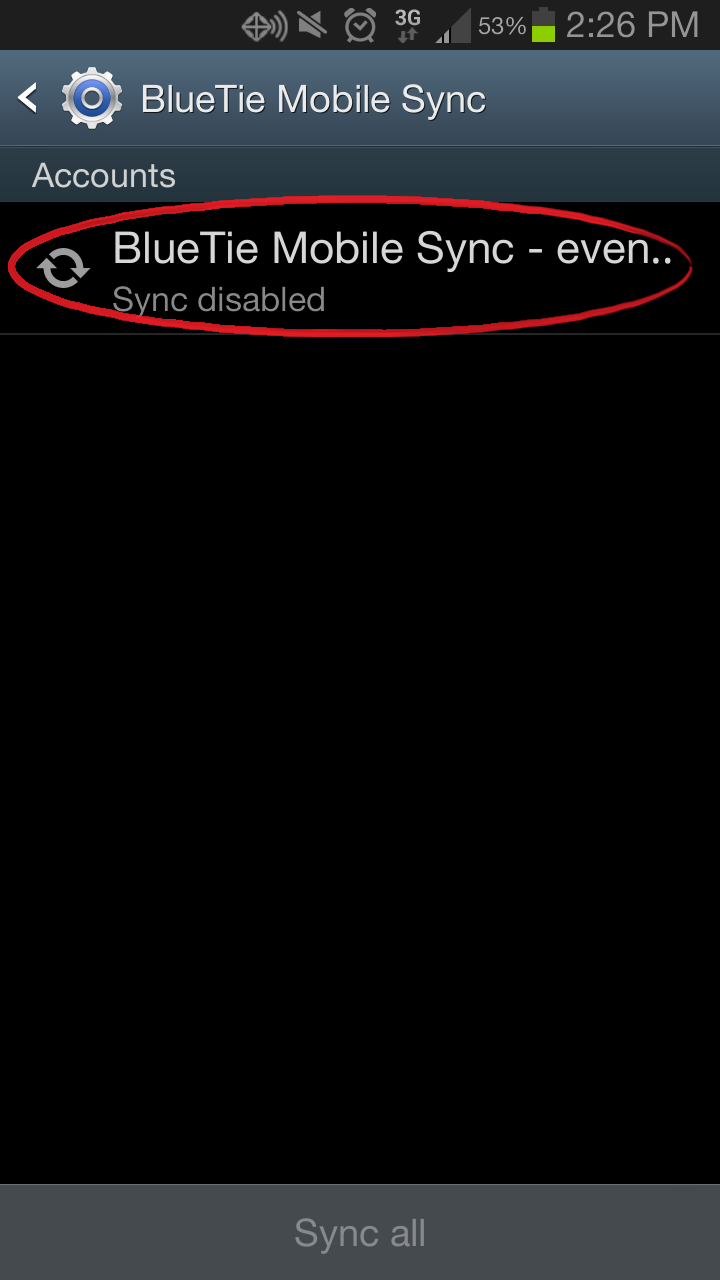
Select the BlueTie account to enable syncing
-
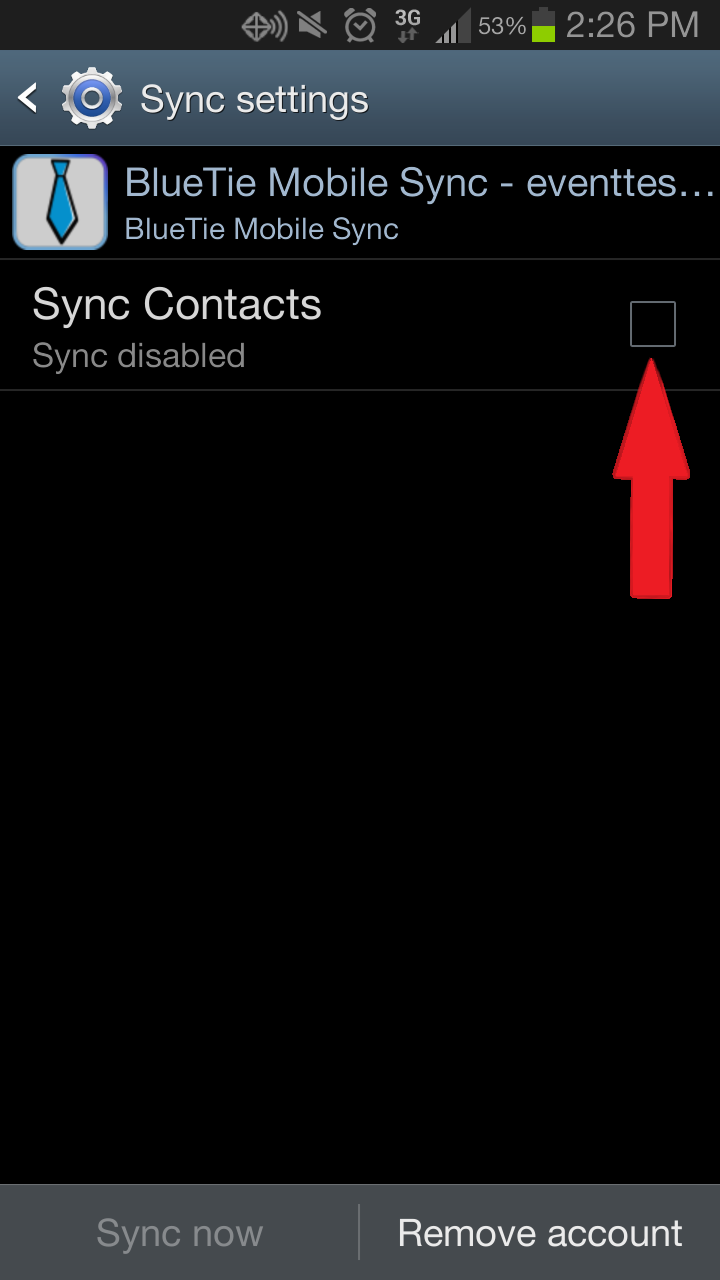
Tap the check box to begin syncing
-
Success! Your BlueTie personal BlueTie contacts are now synced to your phone
You can view these contacts from the Android Contacts App.
Note: You can only sync contacts to your phone, not back to BlueTie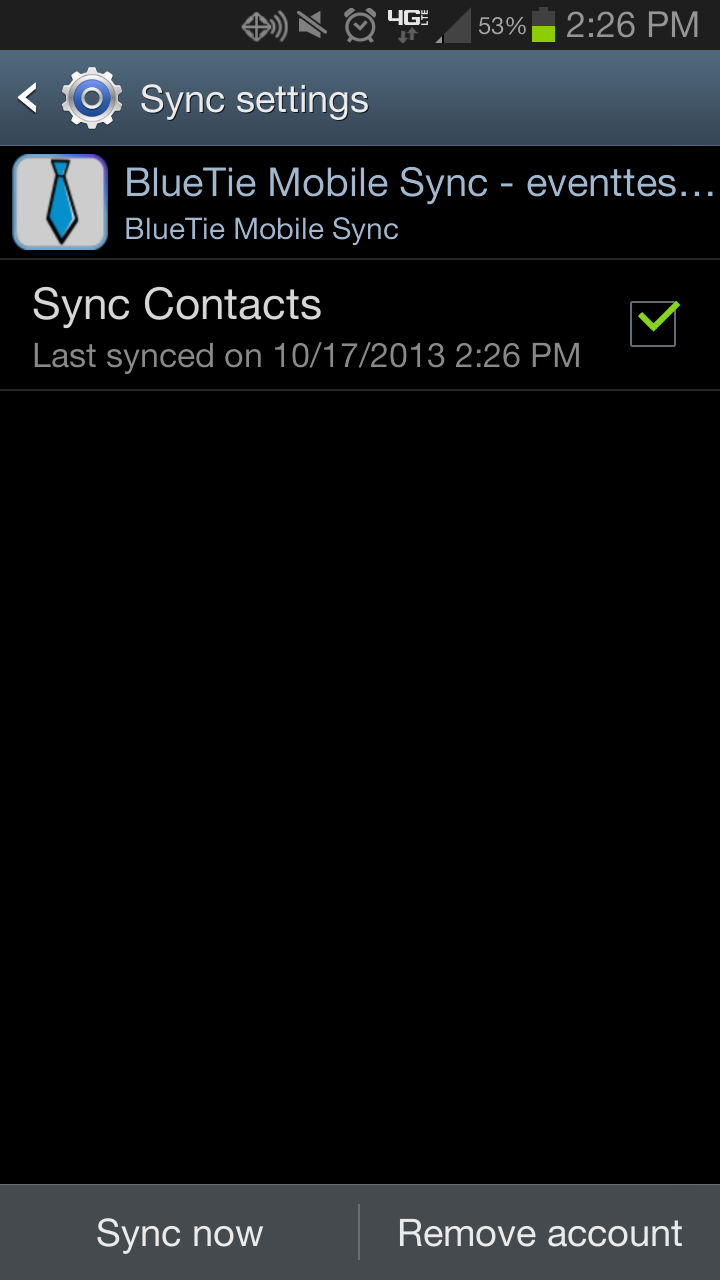
-
Navigate to the settings menu on your phone.
Calendar, Tasks, and Contacts for iPhone
Topics:
-
Setting up your account
-
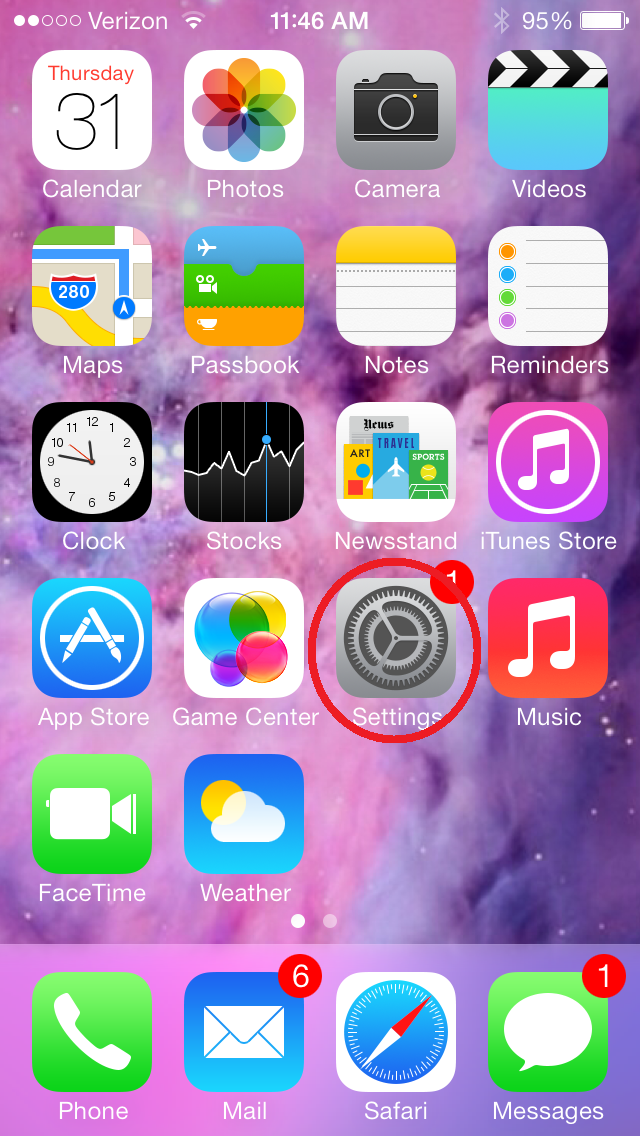
Navigate to the Settings menu on your iPhone.
-
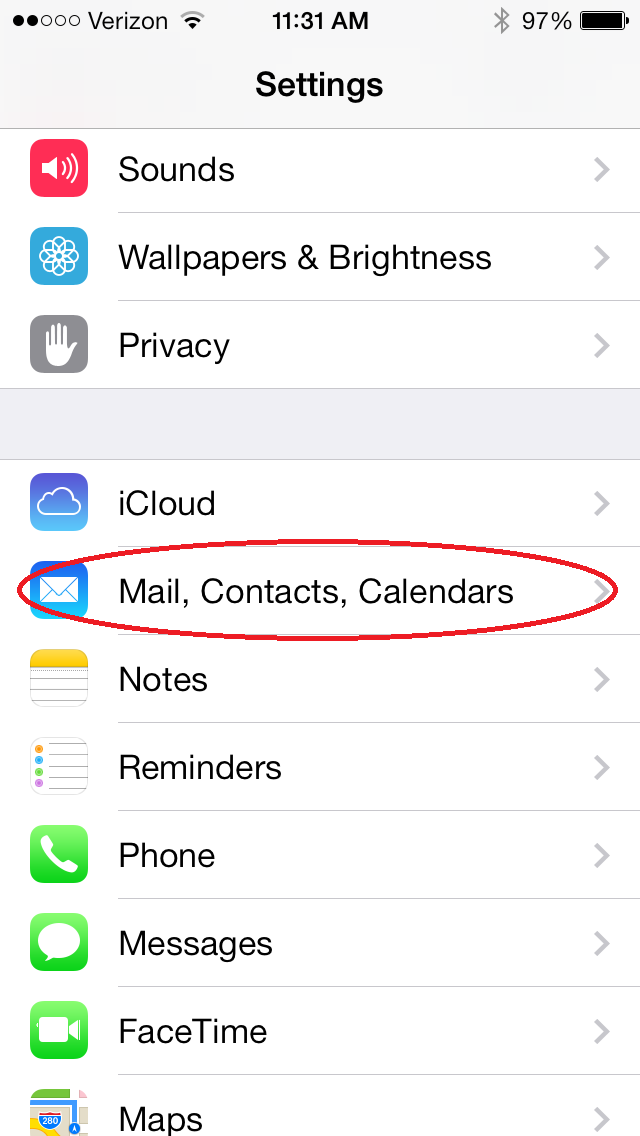
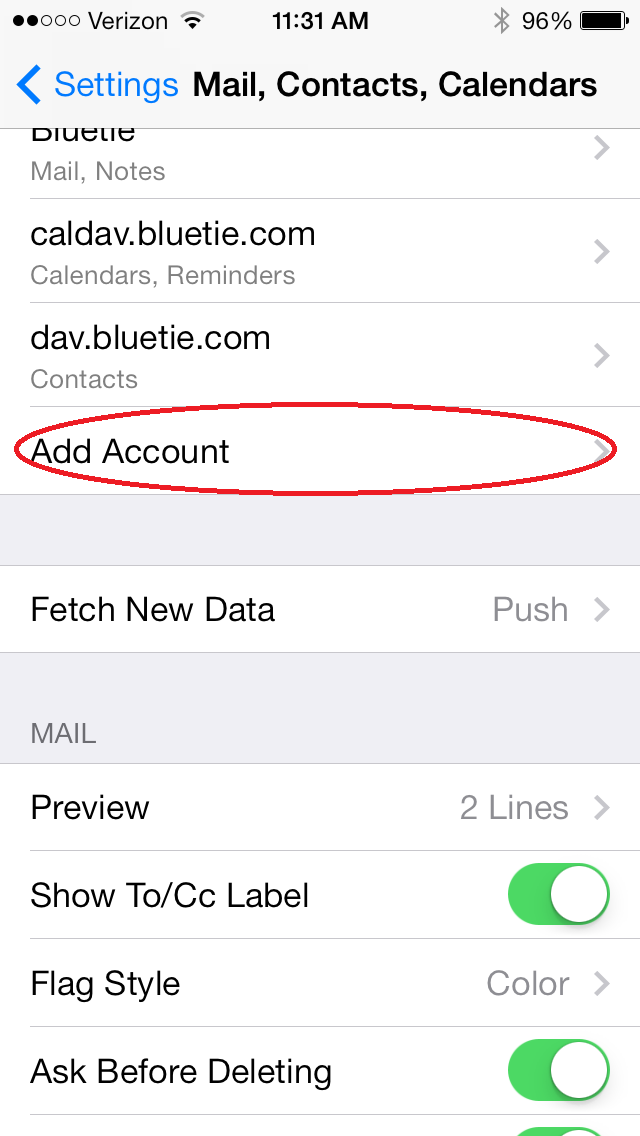
Select Mail, Contacts, Calendars
-
Select Add Account
-
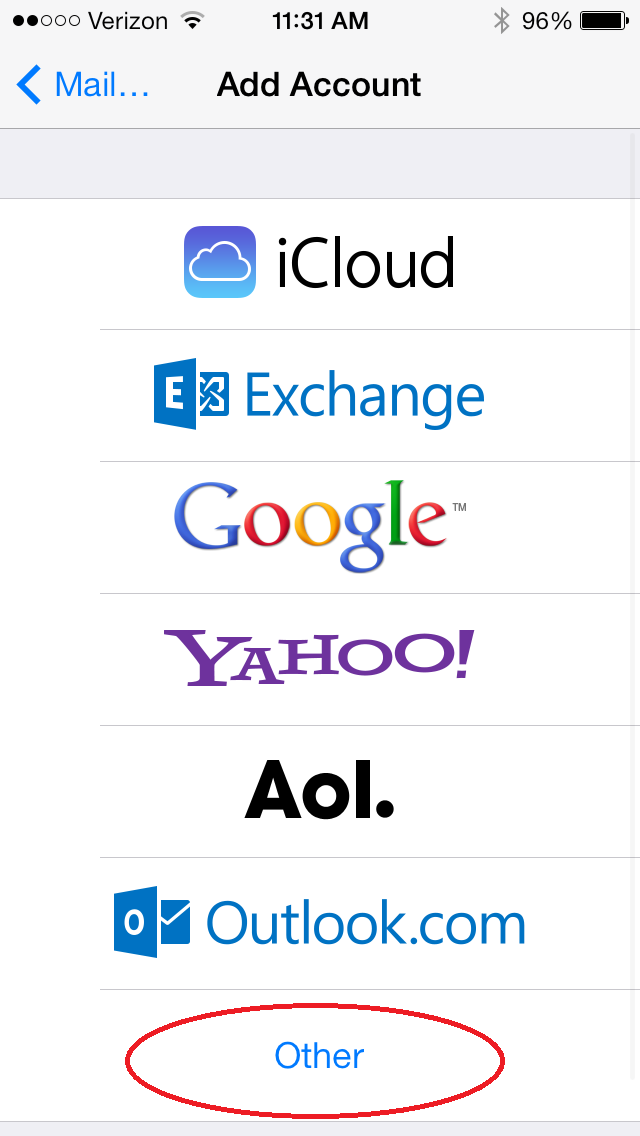
Select Other
-
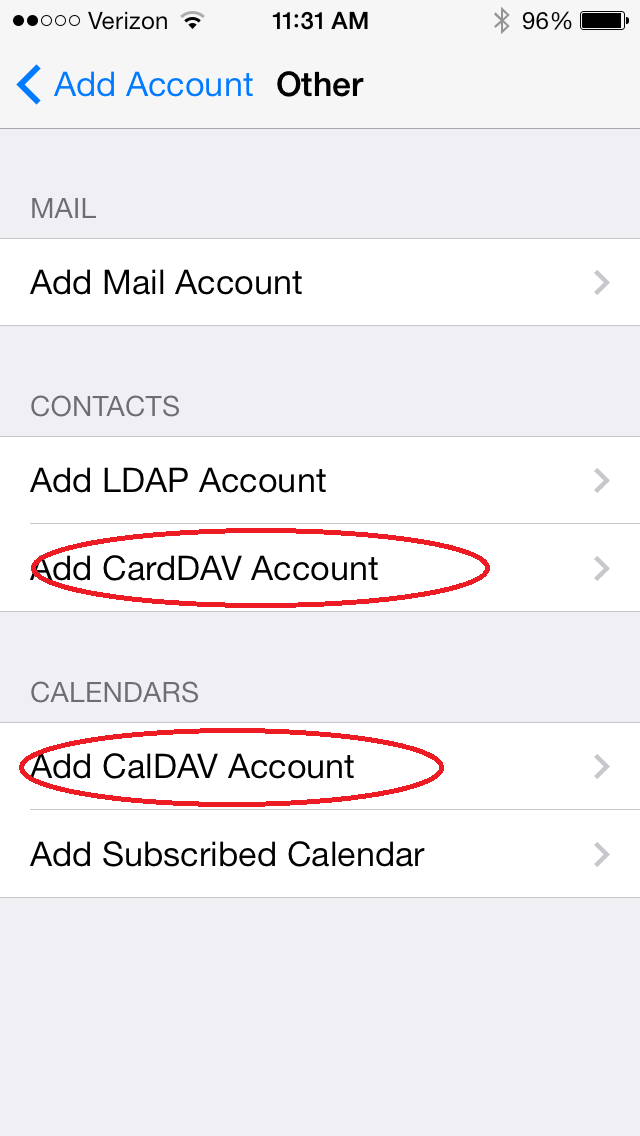
Here you can choose either Calendar or Contacts
Select Add CalDAV Account to sync your calendar
Select Add CardDAV Account to sync your contacts
-
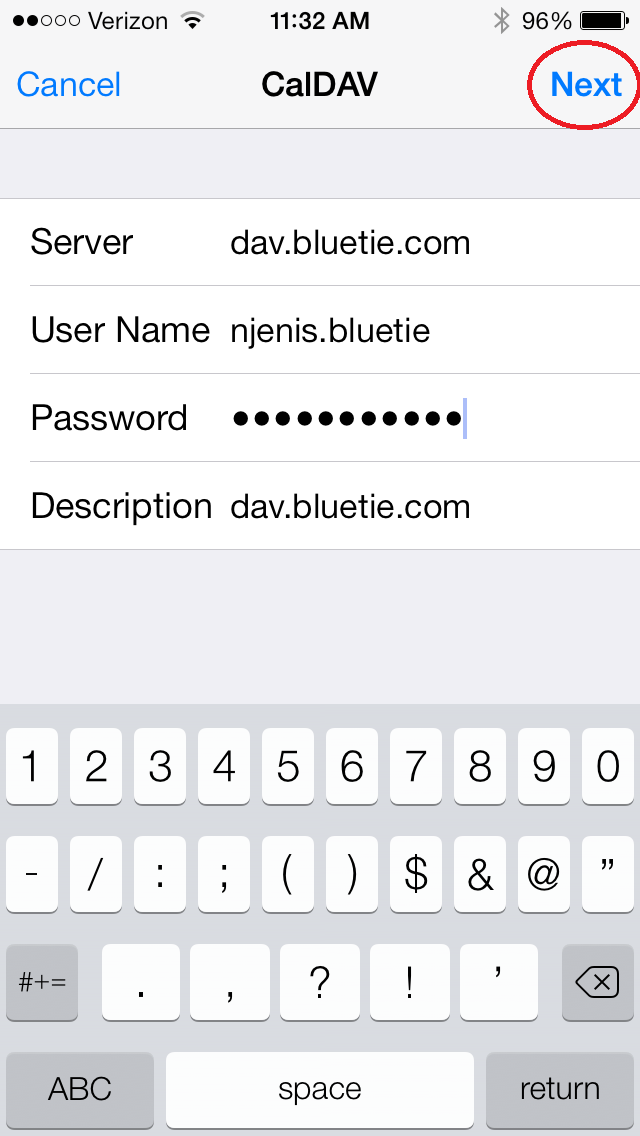
Enter 'dav.bluetie.com' into the server field
Also enter your bluetie login information
Select Next when done
-
If you are setting up a calendar account, you can choose to enable
Calendar and/or Reminders (Tasks)
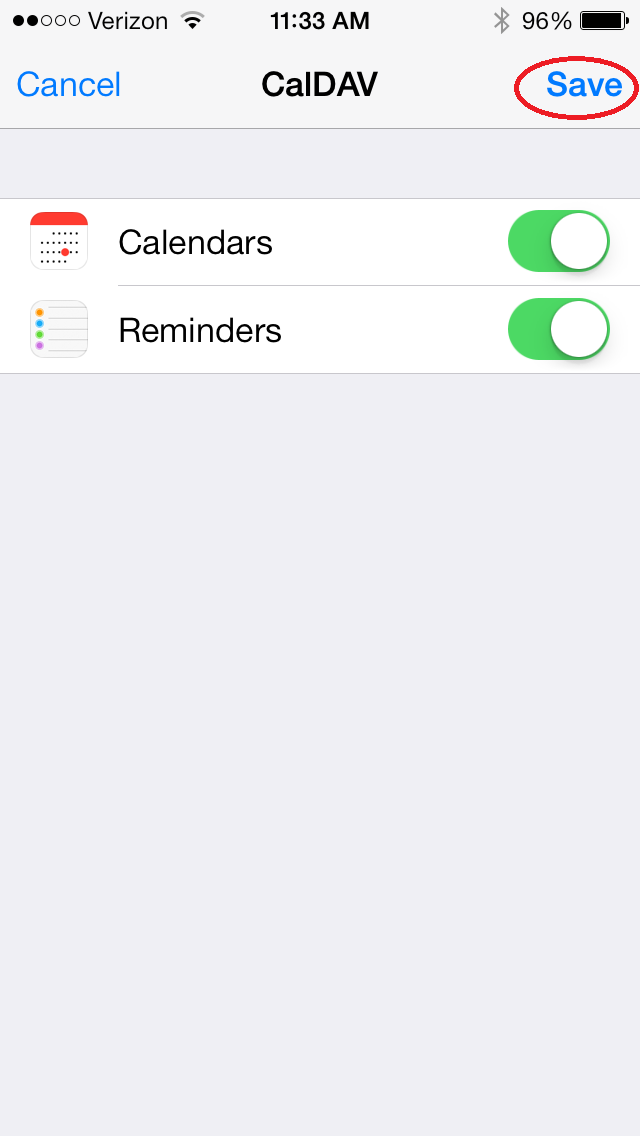
- Success! Your BlueTie events/contacts are now being synced with your iPhone
-
Navigate to the Settings menu on your iPhone.
-
View Calendar events
-
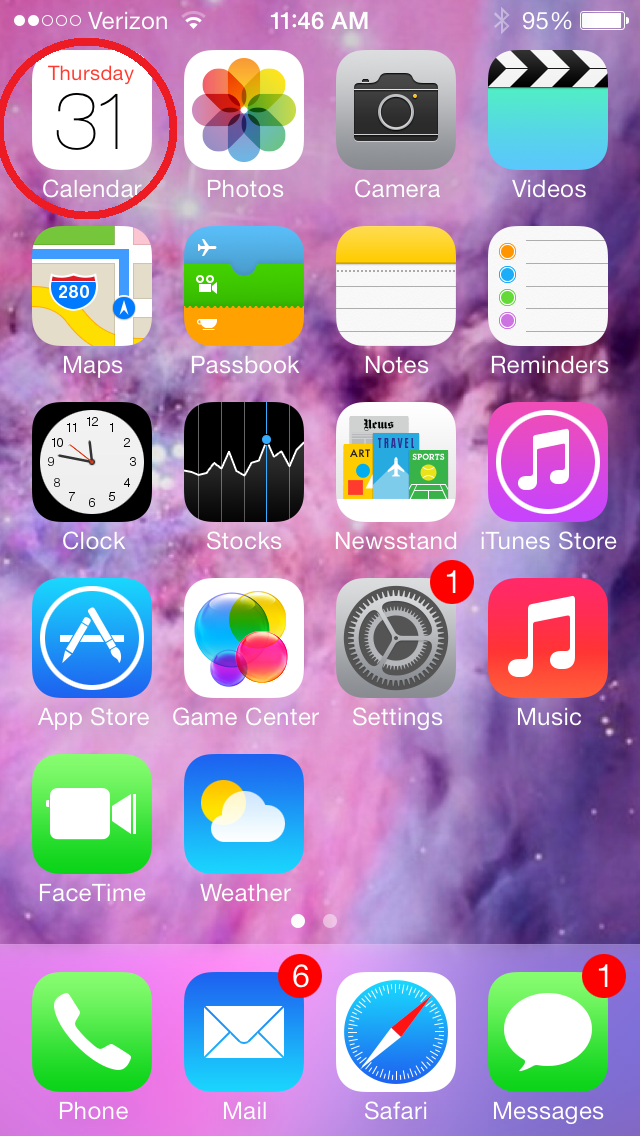
Open the Calendar App
-
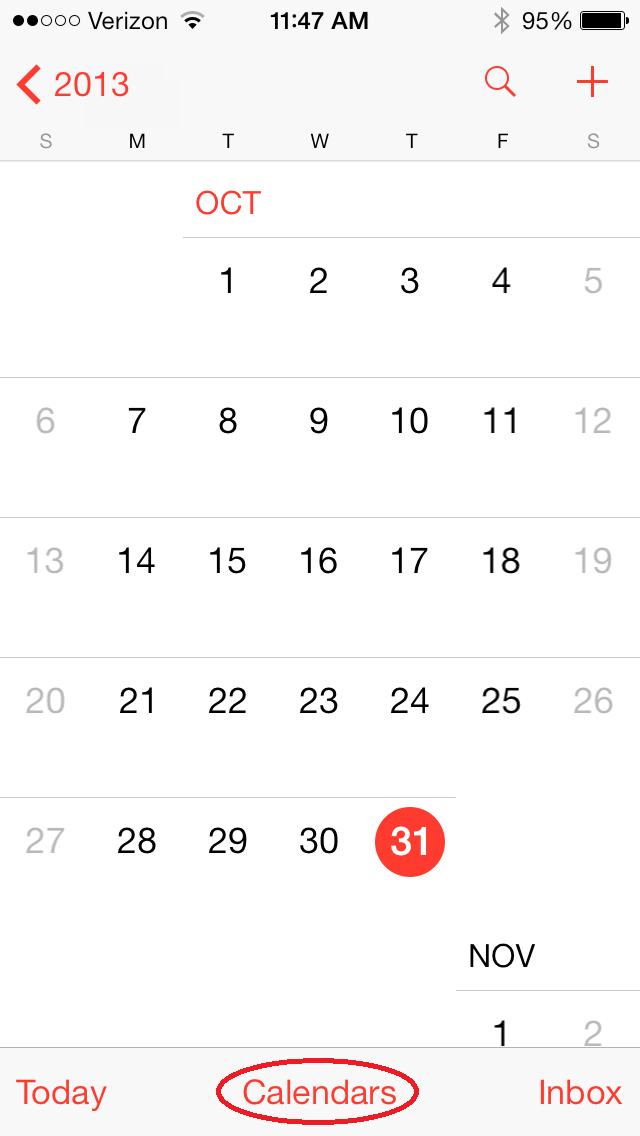
Select Calendars on the bottom of the screen
-
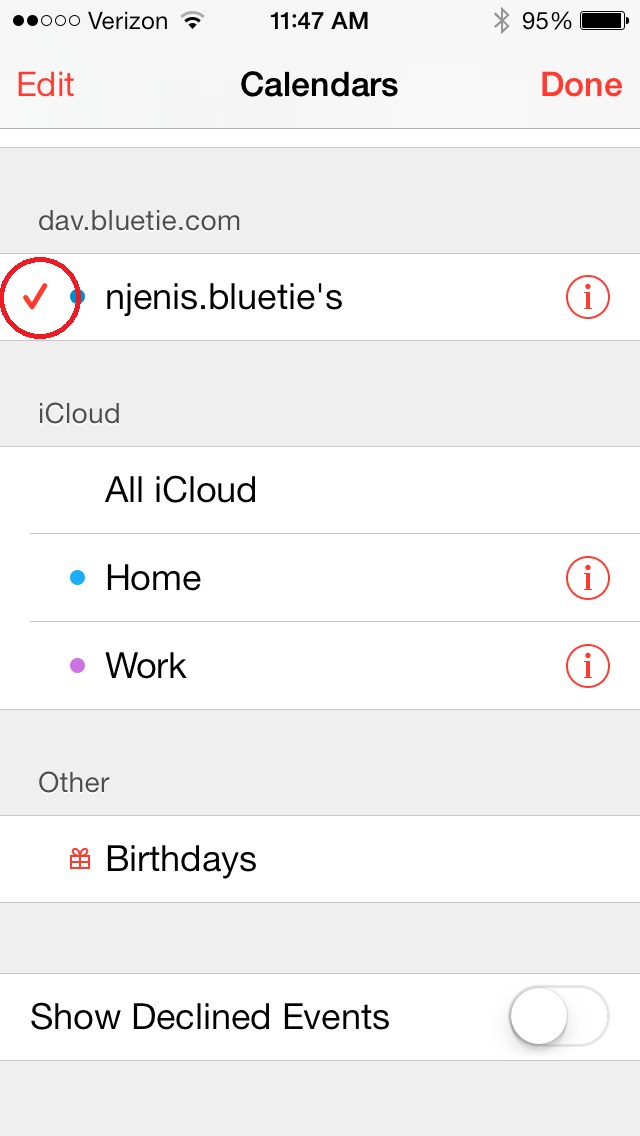
If there is not already a check, press the account so it will show up on the calendar. You may also want to disable any other calendars that you don't need.
Additionally, you can refresh the calendar by swiping down on this screen
-
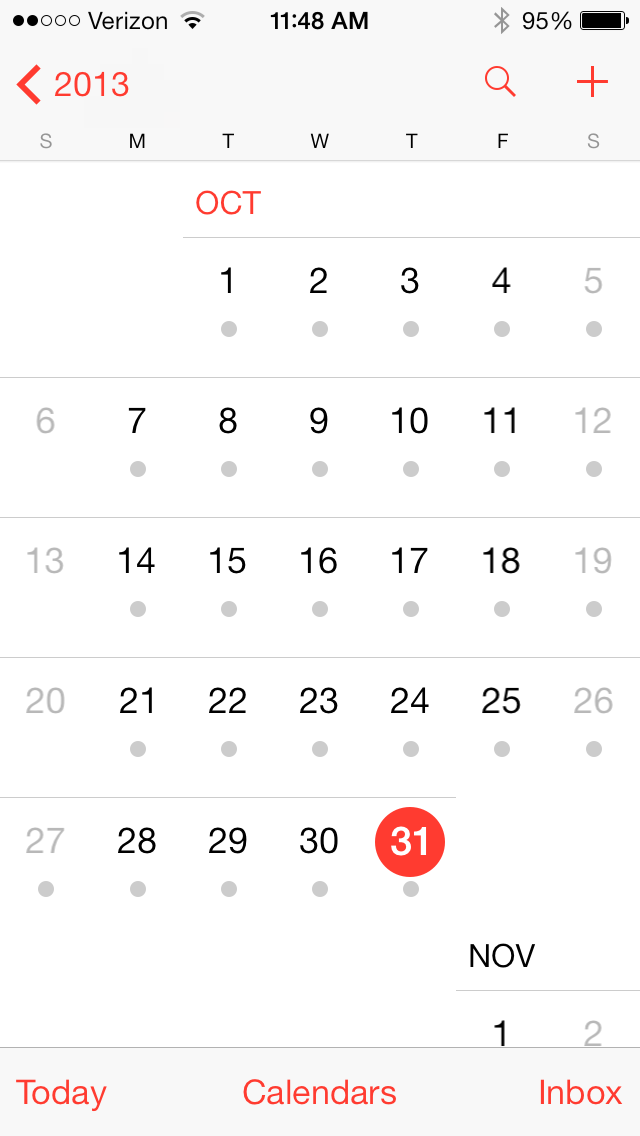
From the main calendar screen you can press a day to view events occurring on that day
-
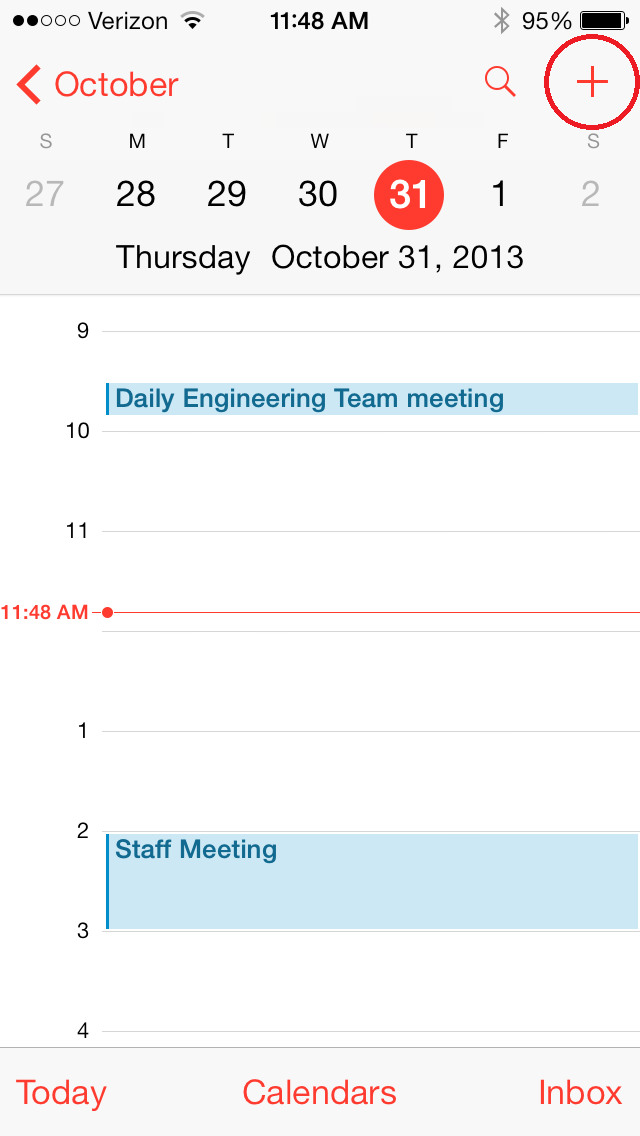
To create a new event, press the plus symbol in the top right, or long press on a time during the day
-
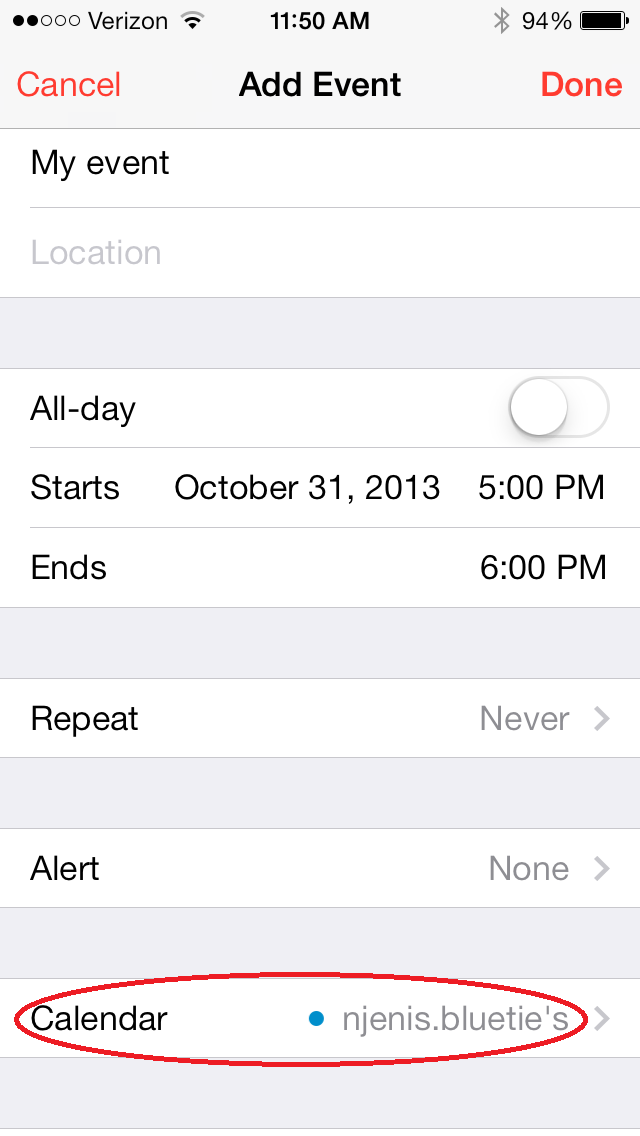
Enter the details of the event you are creating
NOTE: Make sure the event is being added to the correct calendar, otherwise it will not sync with BlueTie
-
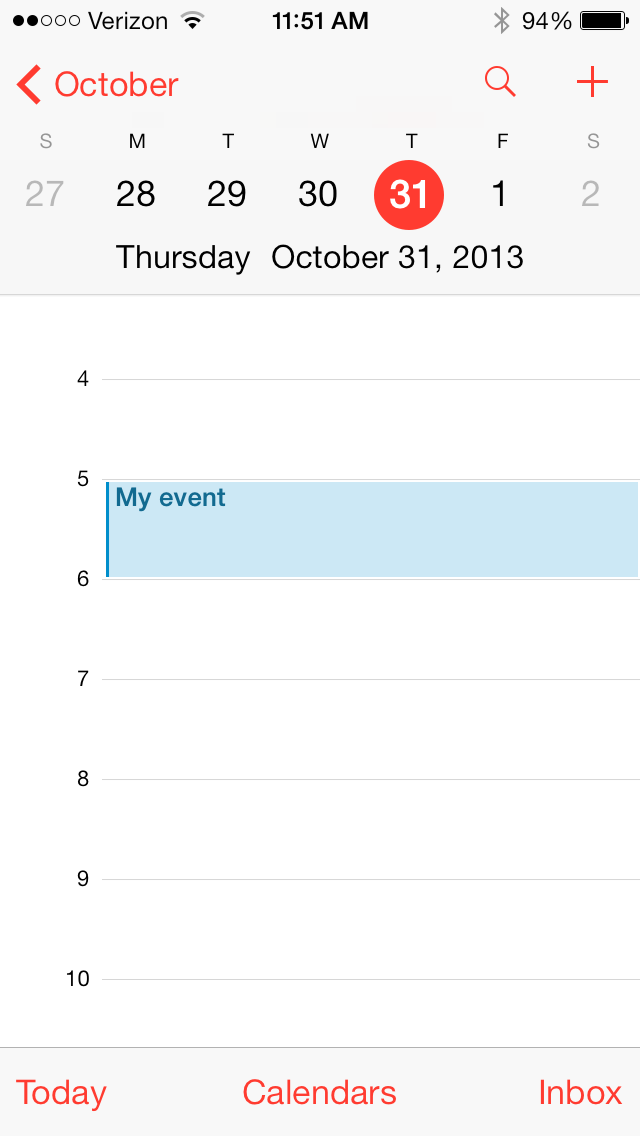
Press Done to save the event and have it sync with your BlueTie calendar
-
Open the Calendar App
-
View Task reminders
-
Open the Reminders App
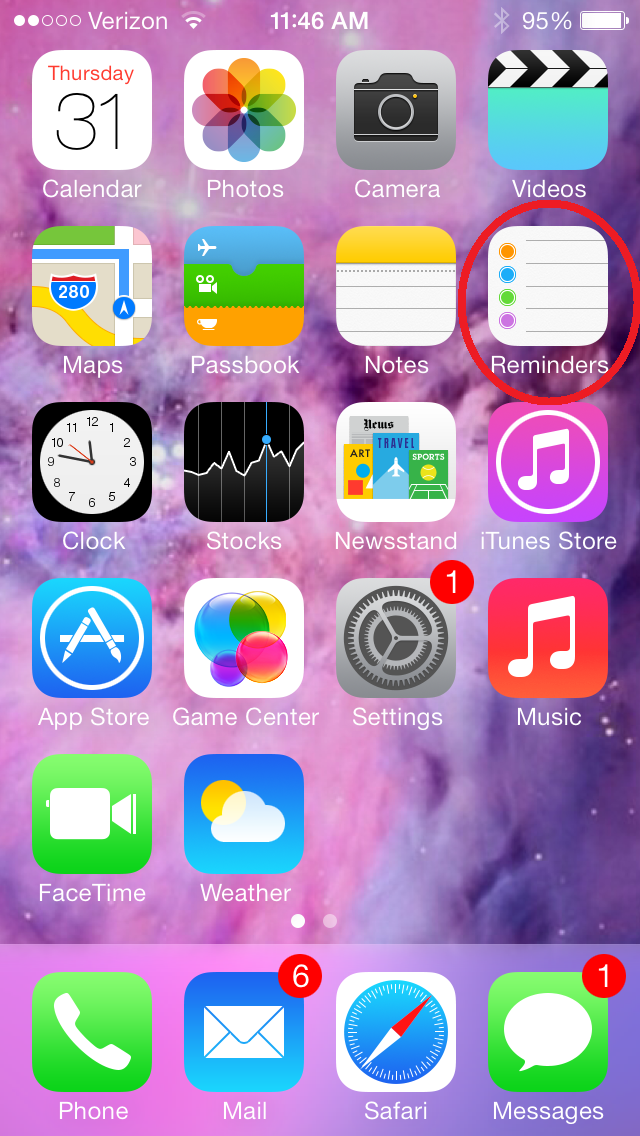
-
Press anywhere on a new line to create a new task.
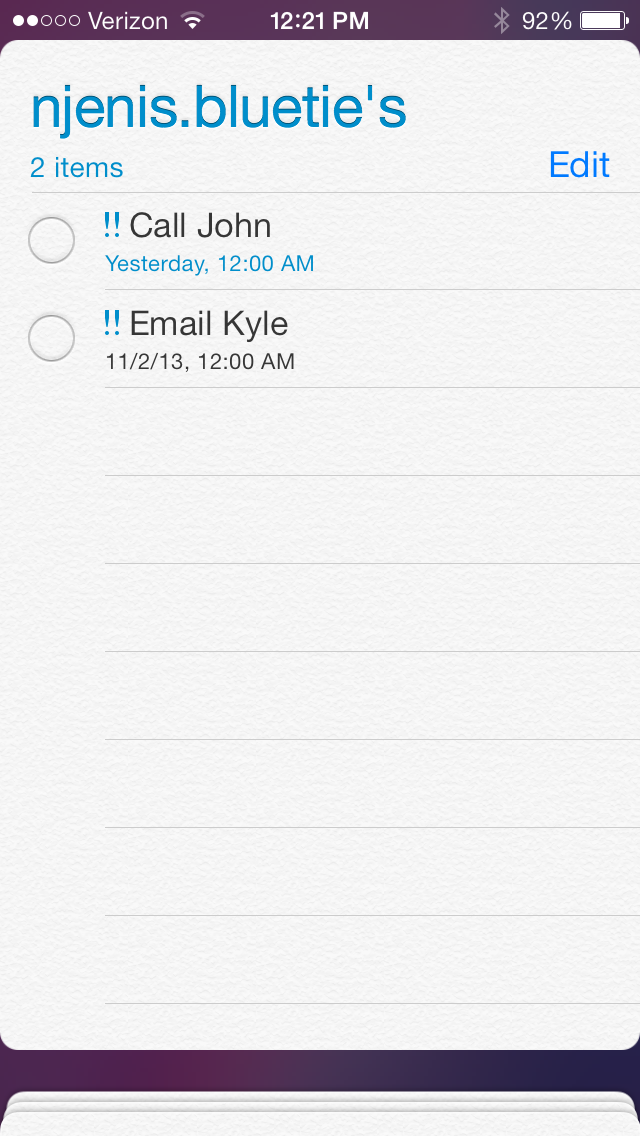
-
You can also edit the task more specifically by pressing the i symbol
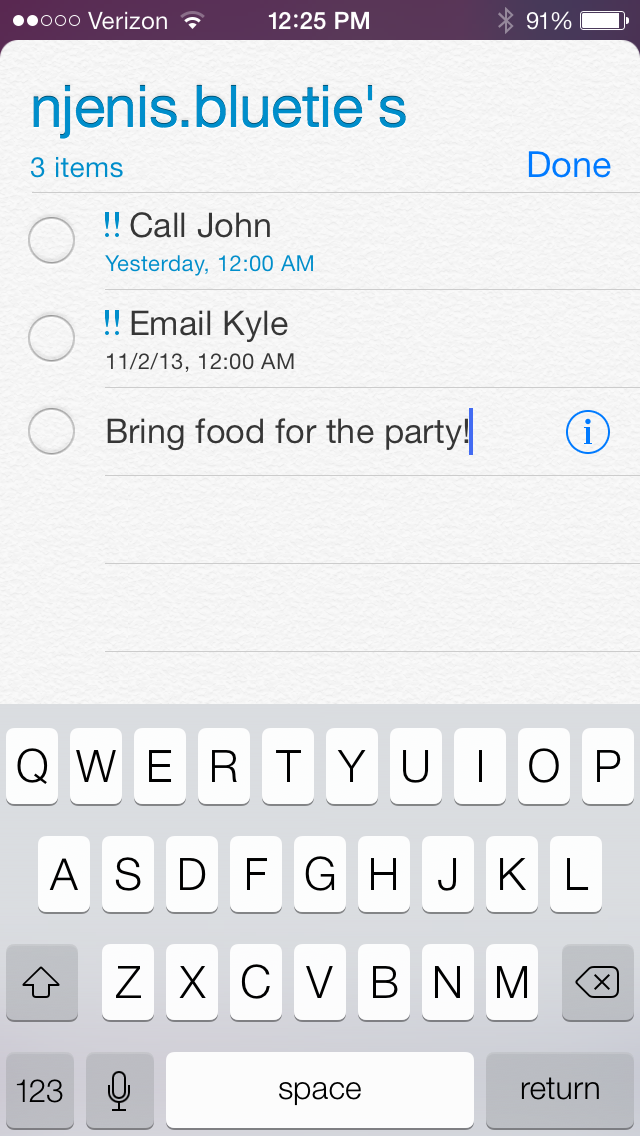
-
Open the Reminders App
-
View Contacts
-
Open the Contacts App
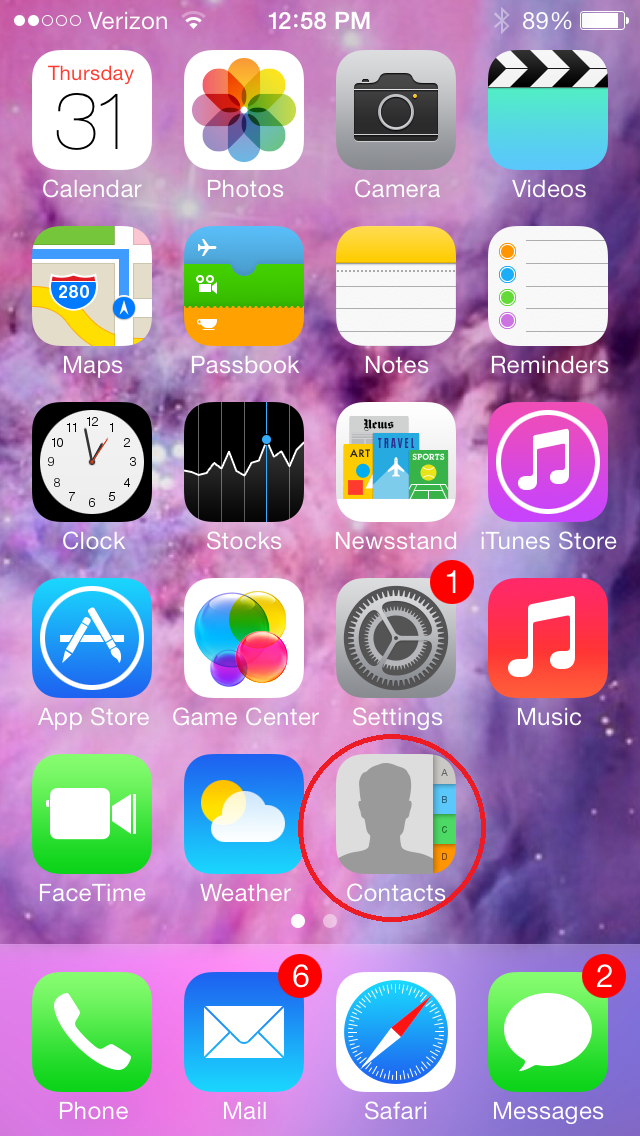
-
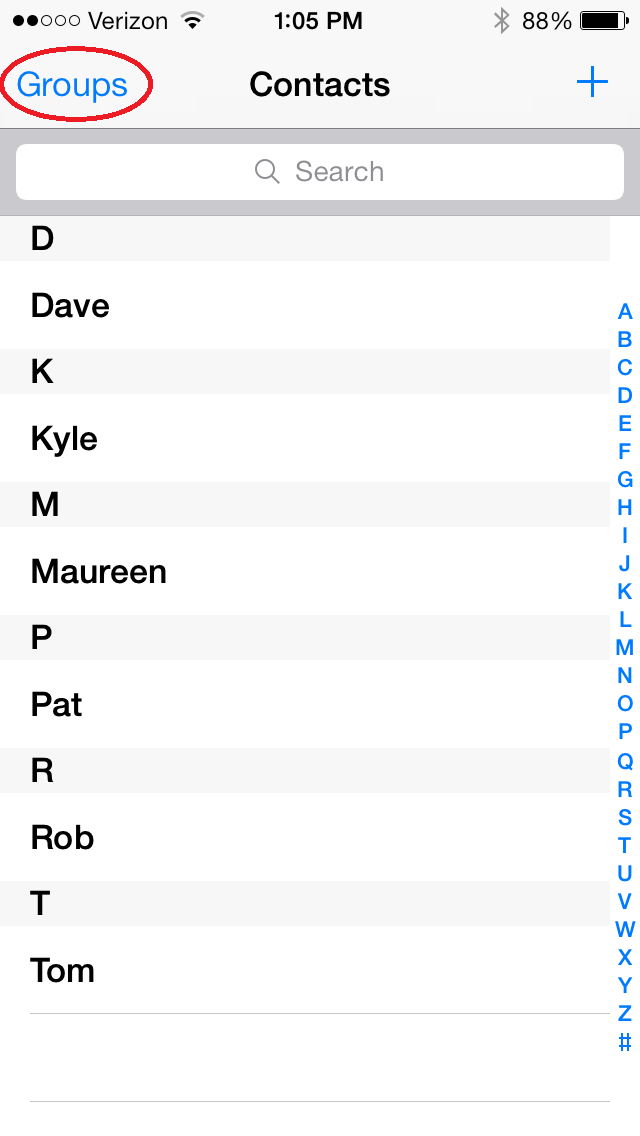
Press on Groups in the top left to select which contacts to sync
-
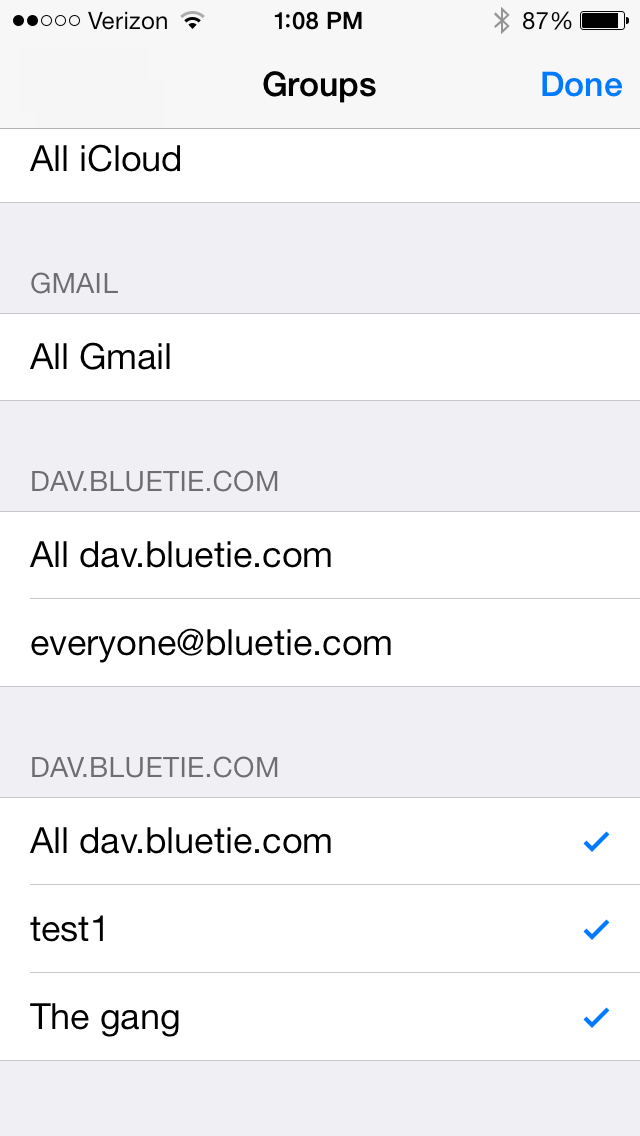
Here you can select which contacts to show in the App
-
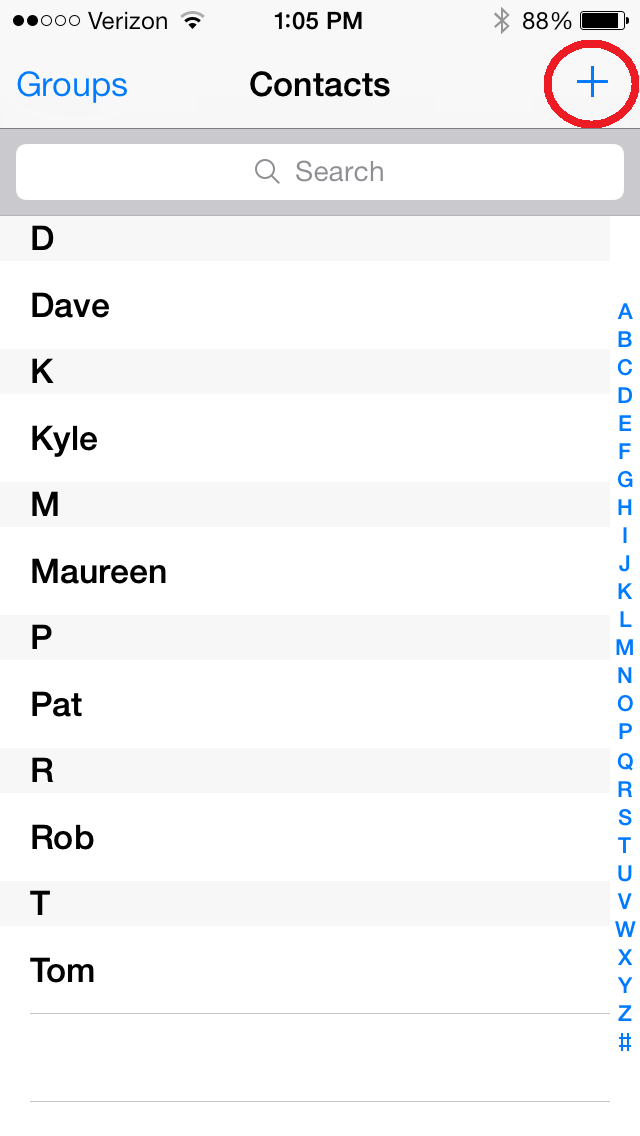
From main Contacts screen, you can create new contacts with the plus symbol
-
Open the Contacts App
-
Remove a Calendar/Contacts account
-
Navigate to the Settings menu on your iPhone.

-
Select Mail, Contacts, Calendars

-
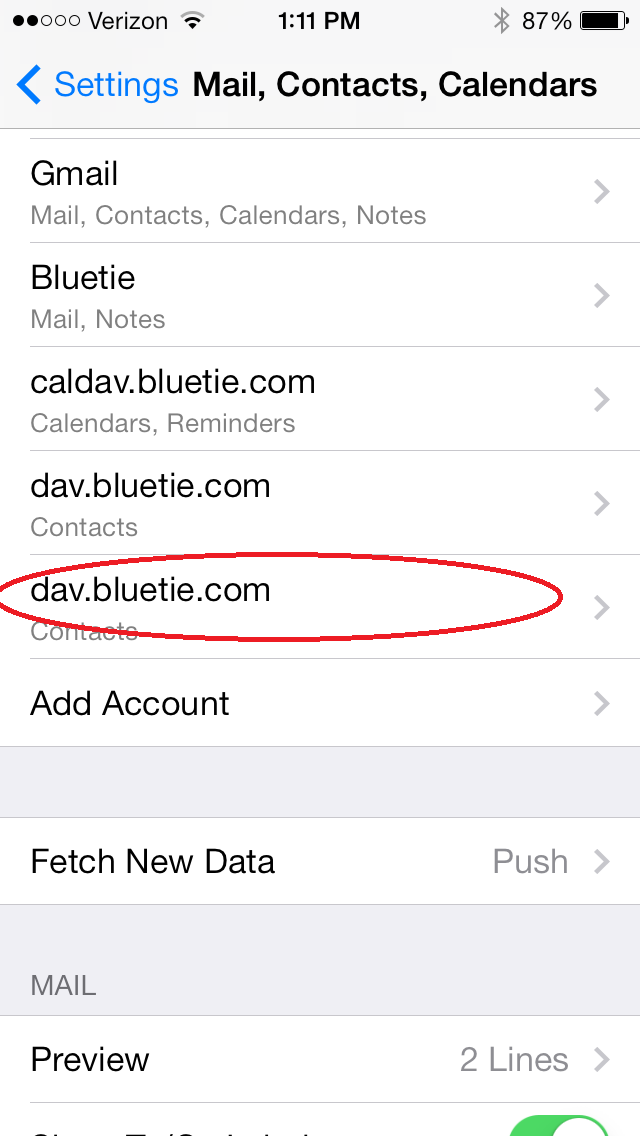
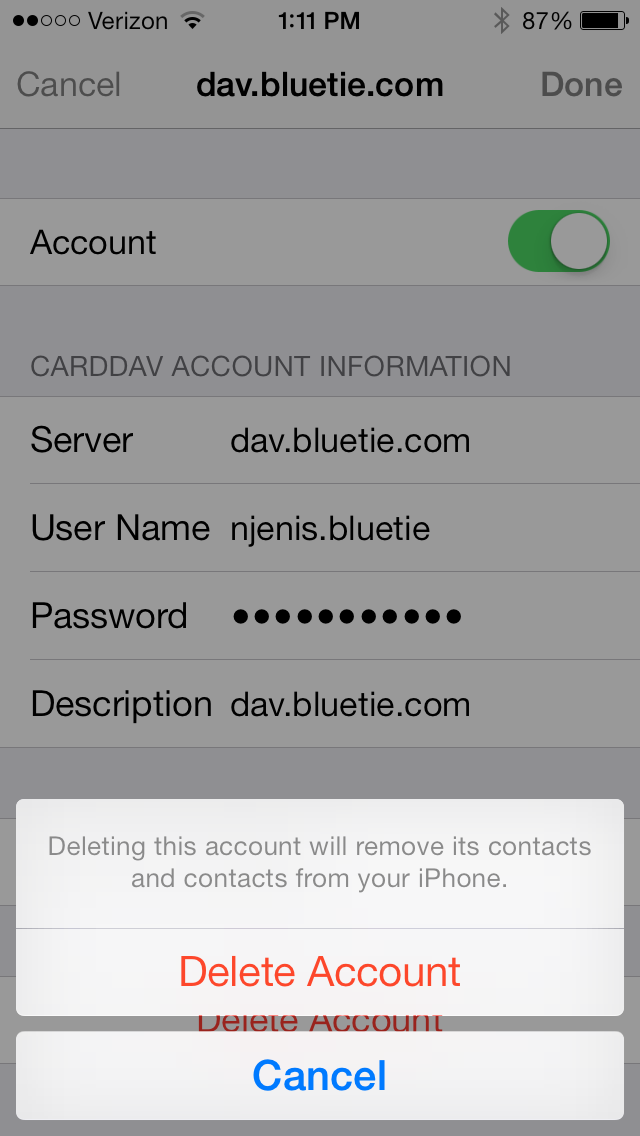
Press the account you want to delete
-
Select Delete Account to remove the account from your iPhone
-
Navigate to the Settings menu on your iPhone.
Mobile Calendar, Contact and Tasks Sync
...
Mozilla Thunderbird
Please click the links below for instructions on setting up Mozilla Thunderbird.
POP Setup
Configuring POP3 Setup for Thunderbird
1. Click on Tools
2. Click on Account Settings
3. Click on Add Account
4. Select Email Account
5. Fill in Your Name and Email Address and click the Next button
6. Select POP as the type of incoming server
7. Type pop.bluetie.com into the Incoming Server field and click the Next button
8. Type your User Name (username.enterprise or email address) and click Next
9. Leave Account name as your email address and click Next
10. Verify Download messages now is checked and Click the Finish button
11. You will be prompted for the password, fill in and choose if you want Thunderbird to remember the password and then press OK
12. Click Tools and select Account Settings
13. Click Outgoing Server from the pane on the left and click the Add button
14. For the Server Name, type smtp.bluetie.com
15. Check the box for Use name and password and fill in your User Name (username.enterprise)
16. Click the OK button and then click the OK button again
Configuring POP3 Setup for Thunderbird w/SSL
1. Click on Tools
2. Click on Account Settings
3. Click on Add Account
4. Select Email Account
5. Fill in Your Name and Email Address and click the Next button
6. Select POP as the type of incoming server
7. Type pop.bluetie.com into the Incoming Server field and click the Next button
8. Type your User Name (username.enterprise or email address) and click Next
9. Leave Account name as your email address and click Next
10. Verify Download messages now is checked and Click the Finish button
11. You will be prompted for the password, fill in and choose if you want Thunderbird to remember the password and then press OK
12. Click Tools and select Account Settings
13. Click Outgoing Server from the pane on the left and click the Add button
14. For the Server Name, type smtp.bluetie.com
15. Check the box for Use name and password and fill in your User Name (username.enterprise)
16. Under the Use Secure Connection check SSL
17. Click on the Server Settings and select Use Secure Connection (TLS)
18. Click the OK button and then click the OK button again
IMAP Setup
IMAP Setup
1) Click Create a new account
2) Select Email account
3) Fill in Your Name and Email Address and click the Next button
4) Select IMAP as the type of incoming server
5) Type imap.bluetie.com into the Incoming Server field
6) Type your User Name (username.enterprise or email address) and click Next
7) Leave Account name as your email address and click Next
8) Verify Download messages now is checked and Click the Finish button
9) You will be prompted for the password, fill in and choose if you want Thunderbird to remember the password and then press OK
10) Click Tools and select Account Settings
11) Click Outgoing Server from the pane on the left and click the Add button
12) For the Server Name, type smtp.bluetie.com
13) Check the box for Use name and password and fill in your your User Name (username.enterprise)
14) Click the OK button and then click the OK button again
Configuring IMAP Setup for Thunderbird w/SSL
1. 1) Click on Tools
2. Click on Account Settings
3. Click on Add Account
4. Select Email Account
5. Fill in Your Name and Email Address and click the Next button
6. Select IMAP as the type of incoming server
7. Type imap.bluetie.com into the Incoming Server field
8. Type your User Name (username.enterprise or email address) and click Next
9. Leave Account name as your email address and click Next
10. Verify Download messages now is checked and Click the Finish button
11. You will be prompted for the password, fill in and choose if you want Thunderbird to remember the password and then press OK
12. Click Tools and select Account Settings
13. Click Outgoing Server from the pane on the left and click the Add button
14. For the Server Name, type smtp.bluetie.com
15. Check the box for Use name and password and fill in your your User Name (username.enterprise)
16. Under the Use Secure Connection check SSL
17. Click on the Server Settings and select Use Secure Connection (SSL)
18. Click the OK button and then click the OK button again
Updated BlueTie Home POP/IMAP/SMTP Server Settings
When configuring your mail clients for your BlueTie Home account, please use the following settings:
IMAP is highly recommended over POP.
IMAP Incoming Server: imap.bluetiehome.com
IMAP Incoming Server Port: 993
Please turn on SSL
POP Incoming Server: pop.bluetiehome.com
POP Incoming Server Port: 995
Please turn on SSL
SMTP Outgoing Server: smtp.bluetiehome.com
SMTP Outgoing Server Port: 587
Please turn on TLS
If you have any questions, please reach out to our support team at support@bluetiehome.com
